0%

什么是 MyBatis

  • MyBatis 是一款优秀的 持久层框架,用于简化 JDBC 开发

持久层

  • 负责将数据保存到数据库的那一层代码
  • JavaEE 三层结构:表现层(页面展示)、业务层(逻辑处理)、持久层(数据库相关)

框架

  • 框架是一个 半成品 软件,是一套可重用的、通用的、软件基础代码模型
  • 在框架的基础之上构建编写更加高效、规范、通用、可扩展

为什么 MyBatis

JDBC 缺点

  1. 硬编码问题

比如注册驱动,获取连接对象时,需要通过变量接收这些字符串,都是写死在代码中的,但是后期可能会对这些字符串进行修改

  1. 操作繁琐

对于处理对象中的问号占位符,手动封装结果集,都需要手动设置参数,操作繁琐

MyBatis 简化

  1. 硬编码问题 ⇒ 通过配置文件解决

比如字符串硬编码问题,将字符串写到 mybatis-config.xml 文件中;将 mysql 语句写到 UserMapper.xml 文件中

  1. 操作繁琐 ⇒ 自动完成

MaBatis 免除了几乎所有的 JDBC 代码以及设置参数和获取结果集的工作

MyBatis 快速入门

案例 1:查询 user 表中的所有数据

  1. 创建 user 表,添加数据
  2. 创建模块,导入坐标
  3. 创建 MyBatis 核心配置文件⇒替换连接信息,解决硬编码问题
  4. 创建 SQL 映射文件⇒统一管理 SQL 语句,解决硬编码问题
    1. 在项目下新建 mapper 包,创建 UserMapper 接口
    2. 在 resources 资源文件夹下,创建 UserMapper.xml 配置文件
  5. Demo 主程序
    1. 定义 POJO 类
    2. 加载核心配置文件,获取 SqlSessionFactory 对象
    3. 获取 SqlSession 对象,执行 SQL 语句
    4. 释放资源

1、创建 user 表,添加数据

1
2
3
4
5
6
7
8
9
10
11
12
13
create database mybatis;
use mybatis;
drop table if exists tb_user;
create table tb_user(
id int primary key auto_increment,
username varchar(20),
password varchar(20),
gender char(1),
addr varchar(30)
);
INSERT INTO tb_user VALUES (1, 'zhangsan', '123', '男', '北京');
INSERT INTO tb_user VALUES (2, '李四', '234', '女', '天津');
INSERT INTO tb_user VALUES (3, '王五', '11', '男', '西安');

2、创建模块,导入坐标

  1. 新建空项目
  2. 点击项目结构,模块,新建模块,选择 Maven 项目
  3. 在 pom.xml 文件中导入如下坐标
1
2
3
4
5
6
7
8
9
10
11
12
13
<dependencies>
<!--mybatis依赖-->
<dependency>
<groupId>org.mybatis</groupId>
<artifactId>mybatis</artifactId>
<version>3.5.5</version>
</dependency>
<!--加载mysql驱动-->
<dependency>
<groupId>mysql</groupId>
<artifactId>mysql-connector-java</artifactId>
<version>8.0.26</version>
</dependency>

3、创建 MyBatis 核心配置文件

  1. 在 resources 文件下新建 mybatis-config.xml 文件,将以下内容粘贴到 xml 文件中。注:代码模板可从 mybatis 官方入门 复制

注意修改数据库的连接信息

1
2
3
4
5
6
7
8
9
10
11
12
13
14
15
16
17
18
19
20
21
22
<?xml version="1.0" encoding="UTF-8" ?>
<!DOCTYPE configuration
PUBLIC "-//mybatis.org//DTD Config 3.0//EN"
"https://mybatis.org/dtd/mybatis-3-config.dtd">
<configuration>
<environments default="development">
<environment id="development">
<transactionManager type="JDBC"/>
<dataSource type="POOLED">
<!--数据库的连接信息-->
<property name="driver" value="com.mysql.jdbc.Driver "/>
<property name="url" value="jdbc:mysql:///mybatis?useSSL=false"/>
<property name="username" value="root"/>
<property name="password" value="root"/>
</dataSource>
</environment>
</environments>
<mappers>
<!--加载sql映射文件-->
<mapper resource="UserMapper.xml"/>
</mappers>
</configuration>

4、创建 SQL 映射文件及接口

  1. 在 mapper 包下新建 UserMapper 接口
1
2
3
4
5
public interface UserMapper {
List<User> selectAll();
//User selectById(int id);

}
  1. 在 resources 文件夹下,新建 UserMapper.xml 配置文件
1
2
3
4
5
6
7
8
9
10
11
12
13
14
15
<?xml version="1.0" encoding="UTF-8" ?>
<!DOCTYPE mapper
PUBLIC "-//mybatis.org//DTD Mapper 3.0//EN"
"https://mybatis.org/dtd/mybatis-3-mapper.dtd">

<!--
namespace:名称空间
-->

<mapper namespace="test">
<!--查询标签,id为这条SQL语句的唯一标识,resultType为返回结果类(POJO类)-->
<select id="selectAll" resultType="com.itheima.pojo.User">
select * from tb_user;
</select>
</mapper>

注:此处的代码模板也可以官方的实例模板中粘贴:探究已映射的 SQL 语句

5、Demo 主程序

1
2
3
4
5
6
7
8
9
10
11
12
13
14
15
16
17
18
19
public class MyBatisDemo {
public static void main(String[] args) throws IOException {
//1.加载mybatis的核心配置文件,获取SqlSessionFactory
String resource = "mybatis-config.xml";
InputStream inputStream = Resources.getResourceAsStream(resource);
SqlSessionFactory sqlSessionFactory = new SqlSessionFactoryBuilder().build(inputStream);

//2.获取SqlSession对象,用它来执行SQL
SqlSession sqlSession = sqlSessionFactory.openSession();

//3.执行SQl语句,名称空间.ID,返回list集合
List<User> users = sqlSession.selectList("test.selectAll");

System.out.println(users);

//4.释放资源
sqlSession.close();
}
}

需求

需要使用 VScode 来编辑 md 文件,并且希望每次在创建 md 文档时,都能够自动补全 YAML 文件信息

配置 setting.json 文件

  1. Ctrl+Shift+P,搜索 setting,选择 首选项:打开用户设置 (json)
  2. 在这给文件中添加如下代码
1
2
3
"[markdown]":  {  
"editor.quickSuggestions": true
}

以下图片显示的是之前就对 setting.json 文件配置过,找到 markdown 的位置添加上述的那一行代码即可;如果之前没有配置过,只需要将上述的那一串代码全部复制到下图中最大的一对黄括号中即可
配置SettingJson.png

配置 md 模板

01-VScode配置用户代码片段.png

  1. Ctrl+Shift+P,搜索 snippets,选则 配置用户代码片段,再选择 markdown
  2. 将一下代码复制进去保存
  3. 新建 md 文档之后,输入 log 敲 tab 即可自动补全配置好的模板
1
2
3
4
5
6
7
8
9
10
11
12
13
14
15
16
17
18
19
20
21
22
{
// Place your snippets for markdown here. Each snippet is defined under a snippet name and has a prefix, body and
// description. The prefix is what is used to trigger the snippet and the body will be expanded and inserted. Possible variables are:
// $1, $2 for tab stops, $0 for the final cursor position, and ${1:label}, ${2:another} for placeholders. Placeholders with the
// same ids are connected.
// Example:
// 联想时显示的文字内容
"create blog": {
"prefix": "log", // 输入log,即显示模板提示
"body": [
// body里是模板内容
"---",
"title: $1", // $1表示生成模板后,光标最先在此位置
"date: $2", // $2表示,在$1处输入完成后,按tab键,光标便跳转到这里,以此类推
"tags:",
" - $3",
"---",
"",
],
"description": "blog模板"
}
}

参考资料

导出高清图片

导出图片时的关键设置

  • 颜色格式设置为 256 位(实际上默认 24 位色也是足够了的)
  • 分辨率设置为打印机模式(400×400 效果已经不错了)
  • 分辨率设置为自定义,300 × 300 像素 /in. 效果已经非常不错

绘制圆角箭头

有时候直接使用直线工具绘制箭头比自带的箭头工具好用得多,以下图片中演示的就是使用直线工具来绘制箭头
Visio绘制圆角箭头.gif

格式刷的应用

比下图所示,箭头可以通过格式化统一成一致的样式
Visio使用格式刷绘制箭头.gif

标准色块的使用

将图片统一调整 / 裁剪成一样的比例 —> 如何快速的设置选框 —> 新建一个固定的标准矩形

Pasted image 20231020154604.png

  1. 新建标准矩形,添加填充色
  2. 裁剪的时候,会有一些透明,可以透过这层透明查找裁剪的边缘,很方便可以找到标准色块的边

上下角标

Visio 不像 Word 那样有上角标,下角标按钮,需要使用到快捷键来完成这个操作

上角标:Ctrl + Shift + =

下角标:Ctrl + =

嵌入 Word 中

如何调整 Visio 对象的嵌入格式以及 Visio 对象尺寸

右键 Visio 对象 —> 图片 —> 调整大小和版式等操作

Visio对象嵌入Word当中调整图片.gif

如何插入表格

从 Excel 中复制表格,粘贴到 Visio 中,粘贴的时候选择性粘贴,选择 Excel 格式。此时 Visio 中的数据是和 Excel 表格中的数据是关联的,还可以实现动态更新呢

如果在 Visio 中调整表格的格式,比如字体的颜色,那么需要双击进入到关联的 Excel 表格中,在 Excel 中修改格式

粘贴到 word 中白边太宽

将 Visio 图直接粘贴到 Word 中时,可能会遇到 Visio 图片显示不全的情况。word 中双击这个 Visio 对象,可以按住 control/Ctrl 键,拖动画布边缘,调整画布尺寸至合适大小,鼠标离开 Visio 对象编辑区域单击即可自动保存

导出图片时最下方出现一行空白

这可能是图片的图注造成的

双击图片时,自动会弹出一个文本框,如果敲了一个空格,再退出编辑,此时图片的图注就仅有一个空白的空格,导致出图的时候把这个空白的图注也带上了

解决方案:可以通过查询空格字符,如果能够查询得到,就会自动跳转到图注位置,删除这个空格即可

visio 取消首字母自动大写

Visio取消首字母自动大写.png

两形状之间直的连接线

这种情况有两种解决办法:

  1. 微调:选中下面的矩形通过 shift+ 方向键 微调来完成
  2. 对齐:选中整个图形,选择排列,选中水平居中进行调整即可
  3. 对不齐的时候,试试按着 Alt 键拖动形状试试:)

绘图时保证图片与文字大小协调

  1. 首先输入 8-12 号的字体,插入图片调整至和文字协调的大小(图片尽可能是由大图调整至小图),也就是说图片的大小按照标准的文字大小进行调整
  2. 最好提前想好这张图在投稿时是打算单栏排版还是双栏排版,或者两个排版方式各导出一张
  3. 图片更新时,最好在同一个 Visio 文件中新建页面,在新建的页面中对图片进行编辑,保存旧版本图片

辅助线

从标尺处拖拉可添加辅助线

连接线与线条

能用线条的地方尽量不要用连接线。连接线通常用来连接两个形状,但是这两个形状位置或大小发生变化或者整张大图的比例需要调整时,这个连接线就会自动更着变化,非常容易导致排版问题。连续画几条线条,这几条线条会自动连接在一起,并且在属性中也可以设置圆角,箭头等属性,这样已经完全可以实现连接线的功能了,所以,尽可能不要再绘图中使用连接线。

编辑 Xmind 导出的形状

  1. Xmind 导出形状为 SVG 格式
  2. Visio 自带 SVG 格式编辑功能
  3. 还是矢量图格式的,妙啊!

Visio2PPT

直接框选复制到 ppt 当中,会自动转换为 emf 格式的矢量图片,而且背景是透明的哦,不会受 vision 背景底图的影响

思维导图样式

![[Visio 一对多多对一线条绘制 1.gif]]

导出 PDF

1、如果有多个页面,导出 PDF 时默认会将所有的页面都导出。如果只想导出当前页面,记得勾选

image.png

2、PDF 页面是按照画布来的,有空白的地方在 PDF 中也会跟着导出,故需要提前调整画布尺寸

image.png

CAD2Visio

在 Visio 中,可将复制到 CAD 图形当成一个对象,双击还可进入 CAD 中进行编辑

收藏夹的应用

1、可应用 Visio 中自带的一些形状,例如水平基线和垂直基线来给图形添加尺寸

image.png

2、可将常用的形状加入收藏夹,后期方便反复调用

image.png

插件官网: Add-ons for Anki 2.1

插件

单词在线发音

正文

注:本文内容的主体结构转载自博客园 LaTeXmath:LaTeX 中列表环境的使用,本人仅对案例中的一些代码、图片及一些宏包的使用做了一些补充。

列表就是将所要表达的内容分为若干个条目并按一定的顺序排列,达到简明、直观的效果。LaTeX 中常见的列表环境有 enumerate、itemize 和 description。这三种列表环境的主要区别是列表项标签的不同:

有序列表和无序列表无需在进行介绍,对于 description 列表来说,可指定其标签

1
2
3
4
5
6
7
8
9
\documentclass{ctexart}
\usepackage{pifont}
\begin{document}
\begin{description}
\item[\ding{47}] This is the first item
\item[\ding{47}] This is the second item
\item[\ding{47}] This is the third item
\end{description}
\end{document}

01-指定description标签.png

了解关于 pifont 宏包的更多信息,请参考:pifont – Access to PostScript standard Symbol and Dingbats fonts,如下为 pifont 的一些字符

02-pifont的一些字符.png

或者参阅以下的简要信息快速了解 pifont 宏包

The package provides commands for Pi fonts (Dingbats, Symbol, etc.); all commands assume you know the character number within the font of the symbol within the font.

列表环境也可以互相嵌套,默认情况下不同层级的标签不同,以体现分级层次。

进阶用法

可参考个人博客:enumitem 宏包中的长度设置 @无锤乙醇

以如下代码对自定义列表环境进行案例分析:

1
2
3
4
5
6
7
8
9
10
11
12
13
14
15
16
\documentclass{ctexart}
\usepackage{enumerate}
\usepackage{enumitem}
\setlist[enumerate,1]{label=(\arabic*).,font=\textup,
leftmargin=7mm,labelsep=1.5mm,topsep=0mm,itemsep=-0.8mm}
\setlist[enumerate,2]{label=(\alph*).,font=\textup,
leftmargin=7mm,labelsep=1.5mm,topsep=-0.8mm,itemsep=-0.8mm}
\begin{document}
\begin{enumerate}
\item 这是一个一级列表
\item 看我在嵌套一个二级列表
\begin{enumerate}
\item 这是一个二级列表
\end{enumerate}
\end{enumerate}
\end{document}

 \setlist[enumerate,1] 表示对一级列表进行设置,\setlist[enumerate,2] 表示对二级列表进行设置。这样一级列表的标签就是括号加阿拉伯数字加点,二级标签是括号加小写英文字母加点。输出效果为:

04-自定义修改列表样式.png

font=\textup 表示使用直立体(可参考官方入门手册)

05-字体命令.png

参考资料

参考资料

简介以及基本用法

请参考 以 Markdown 撰写文稿,以 LaTeX 排版

最小实例

1
2
3
4
5
6
7
8
9
10
11
\documentclass{ctexart}
\usepackage{markdown}
\begin{document}
\begin{markdown}

1.markdown内容顶格写
2.空行检查是否有多余的Tab缩进
3.请使用PowerShell进行编译,无法在TexStudio中的运行进行编译

\end{markdown}
\end{document}

markdown2latex.gif

注意事项

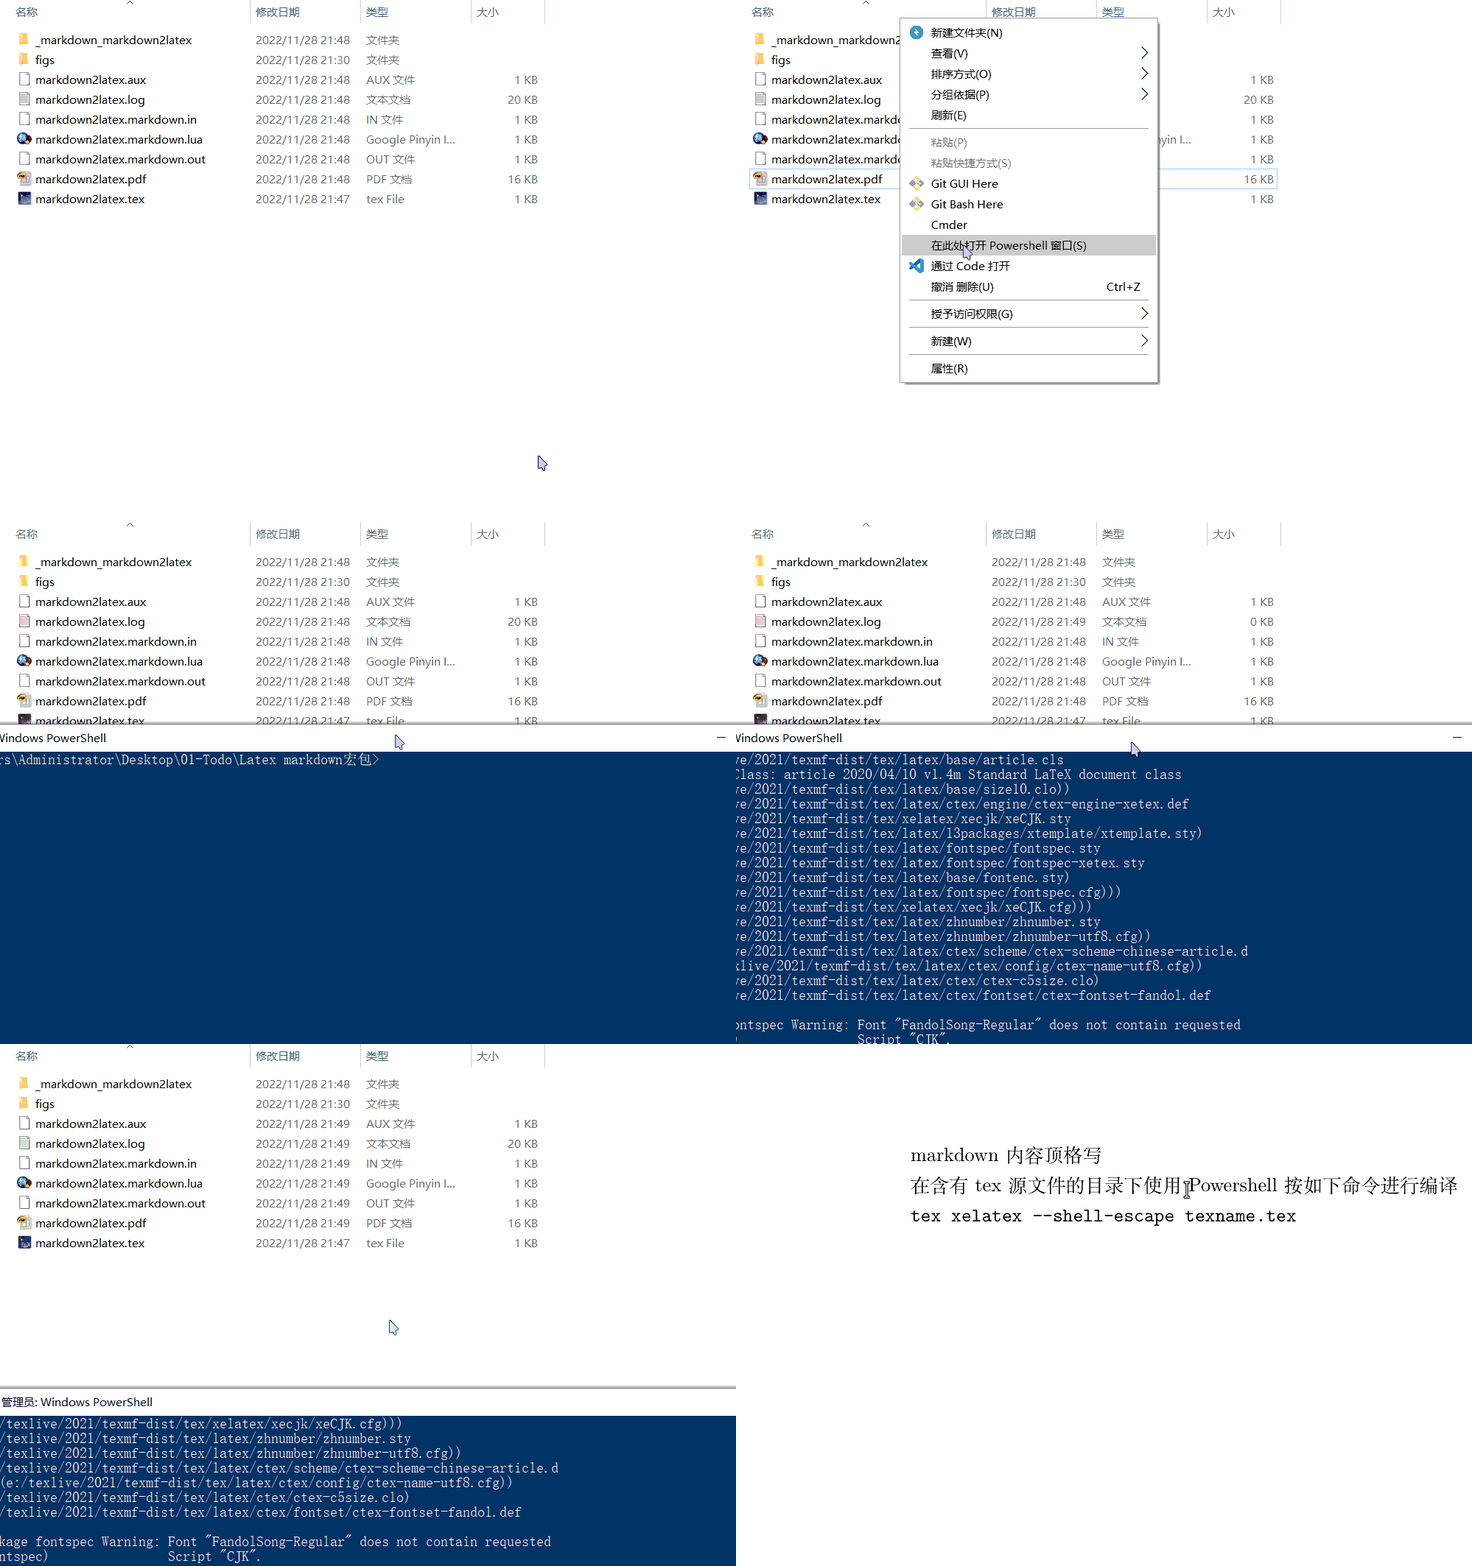
  1. 在含有 tex 源文件的目录下使用 Powershell 对如下命令进行编译
1
xelatex --shell-escape texname.tex
  1. 使用 markdown 宏包之后,需要在 markdown 环境中书写 markdown 内容
  2. markdown 内容做到左侧无缩进(靠左侧顶格写)
  3. 同其他普通的 tex 文档一样,可以使用定制样式的文档类或宏包

比如可以使用我们喜欢的文档类,只要将相应的 cls 文件复制到同一目录下,在导言区引用即可

1
\documentclass[cn,normal,11pt,blue]{elegantnote}

可能会出现的问题

  1. 二级列表也顶格写的话就会变成一级列表

解决办法:在二级列表的前面添加四个空格,而不是增加一个 tab 键

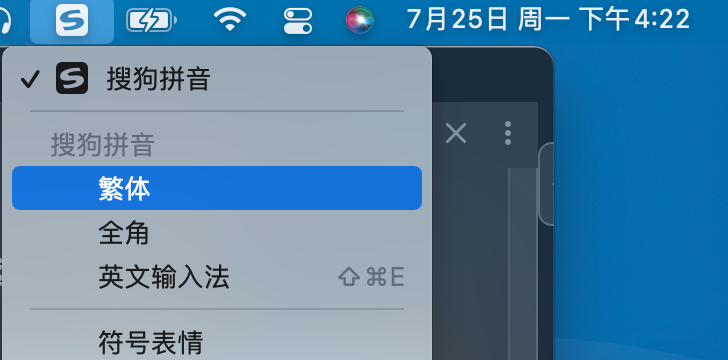
  1. Markdown 中含有繁体中文时,输出的 PDF 中繁体中文显示会有问题
  2. 网页中带有中文字符等特殊符号时,会自动转义导致网页链接出错

解决办法:使用短链接,比如 Github:shorter,或者 Github:short_url

  1. 图片大小渲染问题,请参考:以 Markdown 撰写文稿,以 LaTeX 排版

参考资料

  1. Github:Elegantbook
  2. LaTeX 工作室:浮动体环境内部内容居中的设置方法
  3. LaTeX 工作室:Elegentbook 魔改版

Tex

1
2
3
4
5
6
7
8
9
10
11
12
13
14
15
16
17
18
19
20
21
22
23
24
25
26
27
28
29
30
31
32
33
34
35
36
37
38
39
40
41
42
43
44
45
46
47
48
49
50
51
52
53
54
55
56
57
58
59
60
61
62
63
64
65
66
67
68
69
70
71
72
73
74
75
76
77
78
79
80
81
82
83
84
85
86
87
88
89
90
91
92
93
94
95
96
97
98
99
100
101
102
103
104
105
106
107
108
109
110
111
112
113
114
115
116
117
118
119
120
121
122
123
124
125
126
127
128
129
130
131
132
133
134
135
136
137
138
139
140
141
142
143
144
145
146
147
148
149
150
151
152
153
154
155
156
157
158
159
160
161
162
163
164
165
166
167
168
169
170
171
172
173
174
175
176
177
178
179
180
181
182
183
184
185
186
187
188
189
190
191
192
193
194
195
196
197
198
199
200
201
202
203
204
205
206
207
208
209
210
211
212
213
214
215
216
217
218
219
220
221
222
223
224
225
226
227
228
229
230
231
232
233
234
235
236
237
238
\documentclass{ctexart}
% ====目录章节设置 ====
\usepackage[center,pagestyles]{titlesec}
\usepackage{apptools}
\usepackage[toc,page,title,titletoc]{appendix}
\setcounter{secnumdepth}{5}
% ++++ 章节标题格式设置 ++++
\titleformat{\section}[hang]{\bfseries}{
\Large\bfseries{\color{structurecolor}\thesection}\enspace}{1pt}{%
\color{structurecolor}\Large\bfseries\filright}
\titleformat{\subsection}[hang]{\bfseries}{
\large\bfseries\color{structurecolor}\thesubsection\enspace}{1pt}{%
\color{structurecolor}\large\bfseries\filright}
\titleformat{\subsubsection}[hang]{\bfseries}{
\large\bfseries\color{structurecolor}\thesubsubsection\enspace}{1pt}{%
\color{structurecolor}\large\bfseries\filright}
% ====常用宏包====
\RequirePackage{makecell,lipsum,hologo,setspace}
\RequirePackage{booktabs}
\RequirePackage{multicol,multirow}
% ++++插入图片设置++++
\usepackage{graphics}
\graphicspath{{./figure/}{./figures/}{./image/}{./images/}{./graphics/}{./graphic/}{./pictures/}{./picture/}}
% ++++数学字体宏包++++
\usepackage{amsmath,mathrsfs,amsfonts,amssymb}
% ====行间距设置====
\linespread{1.3}
\renewcommand{\baselinestretch}{1.35}
% ====脚注环境设置====
\AtBeginDocument{
\setlength{\abovedisplayskip}{3pt}
\setlength{\belowdisplayskip}{3pt}
\RequirePackage[flushmargin,stable]{footmisc}
\setlength{\footnotesep}{12pt}
}
% ====设置列表环境====
\usepackage{enumerate}
\usepackage[shortlabels,inline]{enumitem}
\setlist{nolistsep}
% ====颜色设置====
\usepackage{xcolor}
\definecolor{structurecolor}{RGB}{0,120,2}
\definecolor{main}{RGB}{0,120,2}%
\definecolor{second}{RGB}{230,90,7}%
\definecolor{third}{RGB}{0,160,152}%
% ++++设置超链接的颜色++++
\definecolor{winered}{rgb}{0.5,0,0}
% ++++设置浮动体的某些主题色++++
\usepackage[font=small,labelfont={bf,color=structurecolor}]{caption}
\captionsetup[table]{skip=3pt}
\captionsetup[figure]{skip=3pt}
% ====假文宏包====
\usepackage{zhlipsum}
\usepackage{lipsum}
% ====字体设置====
\usepackage{xeCJK}
\setmainfont{Times New Roman}
% ====设置页边距 ====
\usepackage{geometry}
\geometry{
a4paper,
top=25.4mm, bottom=25.4mm,
headheight=2.17cm,
headsep=4mm,
footskip=12mm
}
% ====设置参考文献格式 ====
\usepackage[sort&compress]{natbib}
\setlength{\bibsep}{0.0pt}
\def\bibfont{\footnotesize}
% ====设置页眉页脚 ====
\usepackage{fancyhdr}
\fancyhf{}
\fancyfoot[c]{\color{structurecolor}\scriptsize\thepage}
\newcommand{\citshape}{\kaishu}
\fancyhead[R]{\color{structurecolor}--\;\thepage\;--}
\fancyhead[L]{\color{structurecolor}\citshape\rightmark}
% ++++ 设置页眉页脚 ++++
\renewcommand{\headrule}{\color{structurecolor}\hrule width\textwidth}
\pagestyle{fancy}
\renewcommand{\headrulewidth}{1pt}
% \renewcommand{\headrule}{}
\fancypagestyle{plain}{\renewcommand{\headrulewidth}{0pt}\fancyhf{}\renewcommand{\headrule}{}}
\renewcommand{\sectionmark}[1]{\markright{\thesection\, #1}{} }
%\renewcommand{\chaptermark}[1]{\markboth{\chaptername \, #1\,}{}}
% ====设置公式环境 ====
\numberwithin{equation}{section}
% ====自定义环境 ====
% +++++ note环境 +++++
\newcommand{\notename}{笔记}
\usepackage{bbding,manfnt} % 一些图标,如 \dbend
\newenvironment{note}{
\par\noindent\makebox[-3pt][r]{
\scriptsize\color{red!90}\textdbend\quad}
\textbf{\color{second}\notename} \citshape}{\par}
% +++++ introduction环境 +++++
\newcommand{\introductionname}{内容提要}
\usepackage{multicol}
\usepackage[most]{tcolorbox}
\tcbset{
introductionsty/.style={
enhanced,
breakable,
colback=structurecolor!10,
colframe=structurecolor,
fonttitle=\bfseries,
colbacktitle=structurecolor,
fontupper=\citshape,
attach boxed title to top center={yshift=-3mm,yshifttext=-1mm},
boxrule=0pt,
toprule=0.5pt,
bottomrule=0.5pt,
top=8pt,
before skip=8pt,
sharp corners
},
}
\newenvironment{introduction}[1][\introductionname]{
\begin{tcolorbox}[introductionsty,title={#1}]
\begin{multicols}{2}
\begin{itemize}[label=\textcolor{structurecolor}{\upshape\scriptsize\SquareShadowBottomRight}]}{
\end{itemize}
\end{multicols}
\end{tcolorbox}}
% ====浮动体环境设置:自动居中小一号字 ====
\usepackage{xpatch}
\makeatletter
\xpatchcmd\@floatboxreset{\normalsize}{\centering\small}{}{}
\makeatother
% ====文档超链接设置 ====
\usepackage{hyperref}
\hypersetup{
breaklinks,
unicode,
linktoc=all,
bookmarksnumbered=true,
bookmarksopen=true,
pdfkeywords={Coffeelize},
colorlinks,
linkcolor=winered,
citecolor=winered,
urlcolor=winered,
plainpages=false,
pdfstartview=FitH,
pdfborder={0 0 0},
linktocpage
}
% ==== 代码块样式设置 ====
\usepackage{listings}
\renewcommand{\ttdefault}{cmtt}
\lstdefinestyle{mystyle}{
basicstyle=%
\ttfamily
\lst@ifdisplaystyle\small\fi
}

\lstset{basicstyle=\ttfamily,style=mystyle,breaklines=true}

\definecolor{lightgrey}{rgb}{0.9,0.9,0.9}
\definecolor{frenchplum}{RGB}{190,20,83}
\lstset{language=[LaTeX]TeX,
texcsstyle=*\color{winered},
numbers=none,
mathescape,
breaklines=true,
keywordstyle=\color{winered},
commentstyle=\color{gray},
emph={elegantpaper,fontenc,fontspec,xeCJK,FiraMono,xunicode,newtxmath,figure,fig,image,img,table,itemize,enumerate,newtxtext,newtxtt,ctex,microtype,description,times,booktabs,tabular,PDFLaTeX,XeLaTeX,type1cm,BibTeX,device,color,mode,lang,amsthm,tcolorbox,titlestyle,cite,ctex,listings,base,math,scheme,toc,esint,chinesefont,amsmath,bibstyle,gbt7714,natbib},
emphstyle={\color{frenchplum}},
morekeywords={DeclareSymbolFont,SetSymbolFont,toprule,midrule,bottomrule,institute,version,includegraphics,setmainfont,setsansfont,setmonofont ,setCJKmainfont,setCJKsansfont,setCJKmonofont,RequirePackage,figref,tabref,email,maketitle,keywords,definecolor,extrainfo,logo,cover,subtitle,appendix,chapter,hypersetup,mainmatter,frontmatter,tableofcontents,elegantpar,heiti,kaishu,lstset,pagecolor,zhnumber,marginpar,part,equote,marginnote,bioinfo,datechange,listofchange,lvert,lastpage,songti,heiti,fangsong,setCJKfamilyfont,textbf},
frame=single,
tabsize=2,
rulecolor=\color{structurecolor},
framerule=0.2pt,
columns=flexible,
% backgroundcolor=\color{lightgrey}
}

\begin{document}
% ==== frontmatter ====
\title{这是智朋的自定义模板}
\author{Coffeelize}
\tableofcontents
\clearpage
% ====正文开始 ====
% ++++ mainmatter ++++

\textcolor{main}{\lipsum[1]}
\textcolor{second}{\zhlipsum[1]}
\textcolor{third}{\zhlipsum[1]}

\section{列表环境示例}
\begin{enumerate}
\item first
\item second\footnote{这是一个脚注测试}
\item third
\end{enumerate}
有序列表,参数说明如下:
\begin{enumerate}
\item 最大序号:用于测定文献列表中文献序号的最大宽度,如果你是10以内的参考文献,那就用9,超过10小于100那就填99.
\item 文献序号:可选参数,用于设定该条文献在参考文献列表中的序号。
\item 检索名:为该文献信息起的简短名称,
\item 文献信息:就是参考文献内容了。
\end{enumerate}
\section{图片环境示例}
\begin{figure}
\includegraphics{example-image-A}
\caption{这是一张实例图片}
\end{figure}
\subsection{这是一个二级标题}
\zhlipsum[1-2]
\begin{note}
这里其实容易出问题的是图片大学不一样怎么版,通常我的解决办法是,从一开始就把两图片的大小设置成一样的,或者通过改参数实现。关于参数如何改,多改改就用经验了!O(∩\_∩)O
\end{note}

\subsubsection{这是一个三级标题}

一下是一个章节的内容摘要
\begin{introduction}
\item 参考文献
\item 交叉引用
\item 代码框设计
\item 网址链接
\end{introduction}

\begin{lstlisting}
\begin{figure}[H]
\centering
\includegraphics[width=0.45\linewidth]{welt1.jpg}
%插入的第一个图片
\includegraphics[width=0.45\linewidth]{welt.jpg}
%插入的第二张图片
\caption{紫罗兰永恒花园}
\end{figure}
\end{lstlisting}

\end{document}

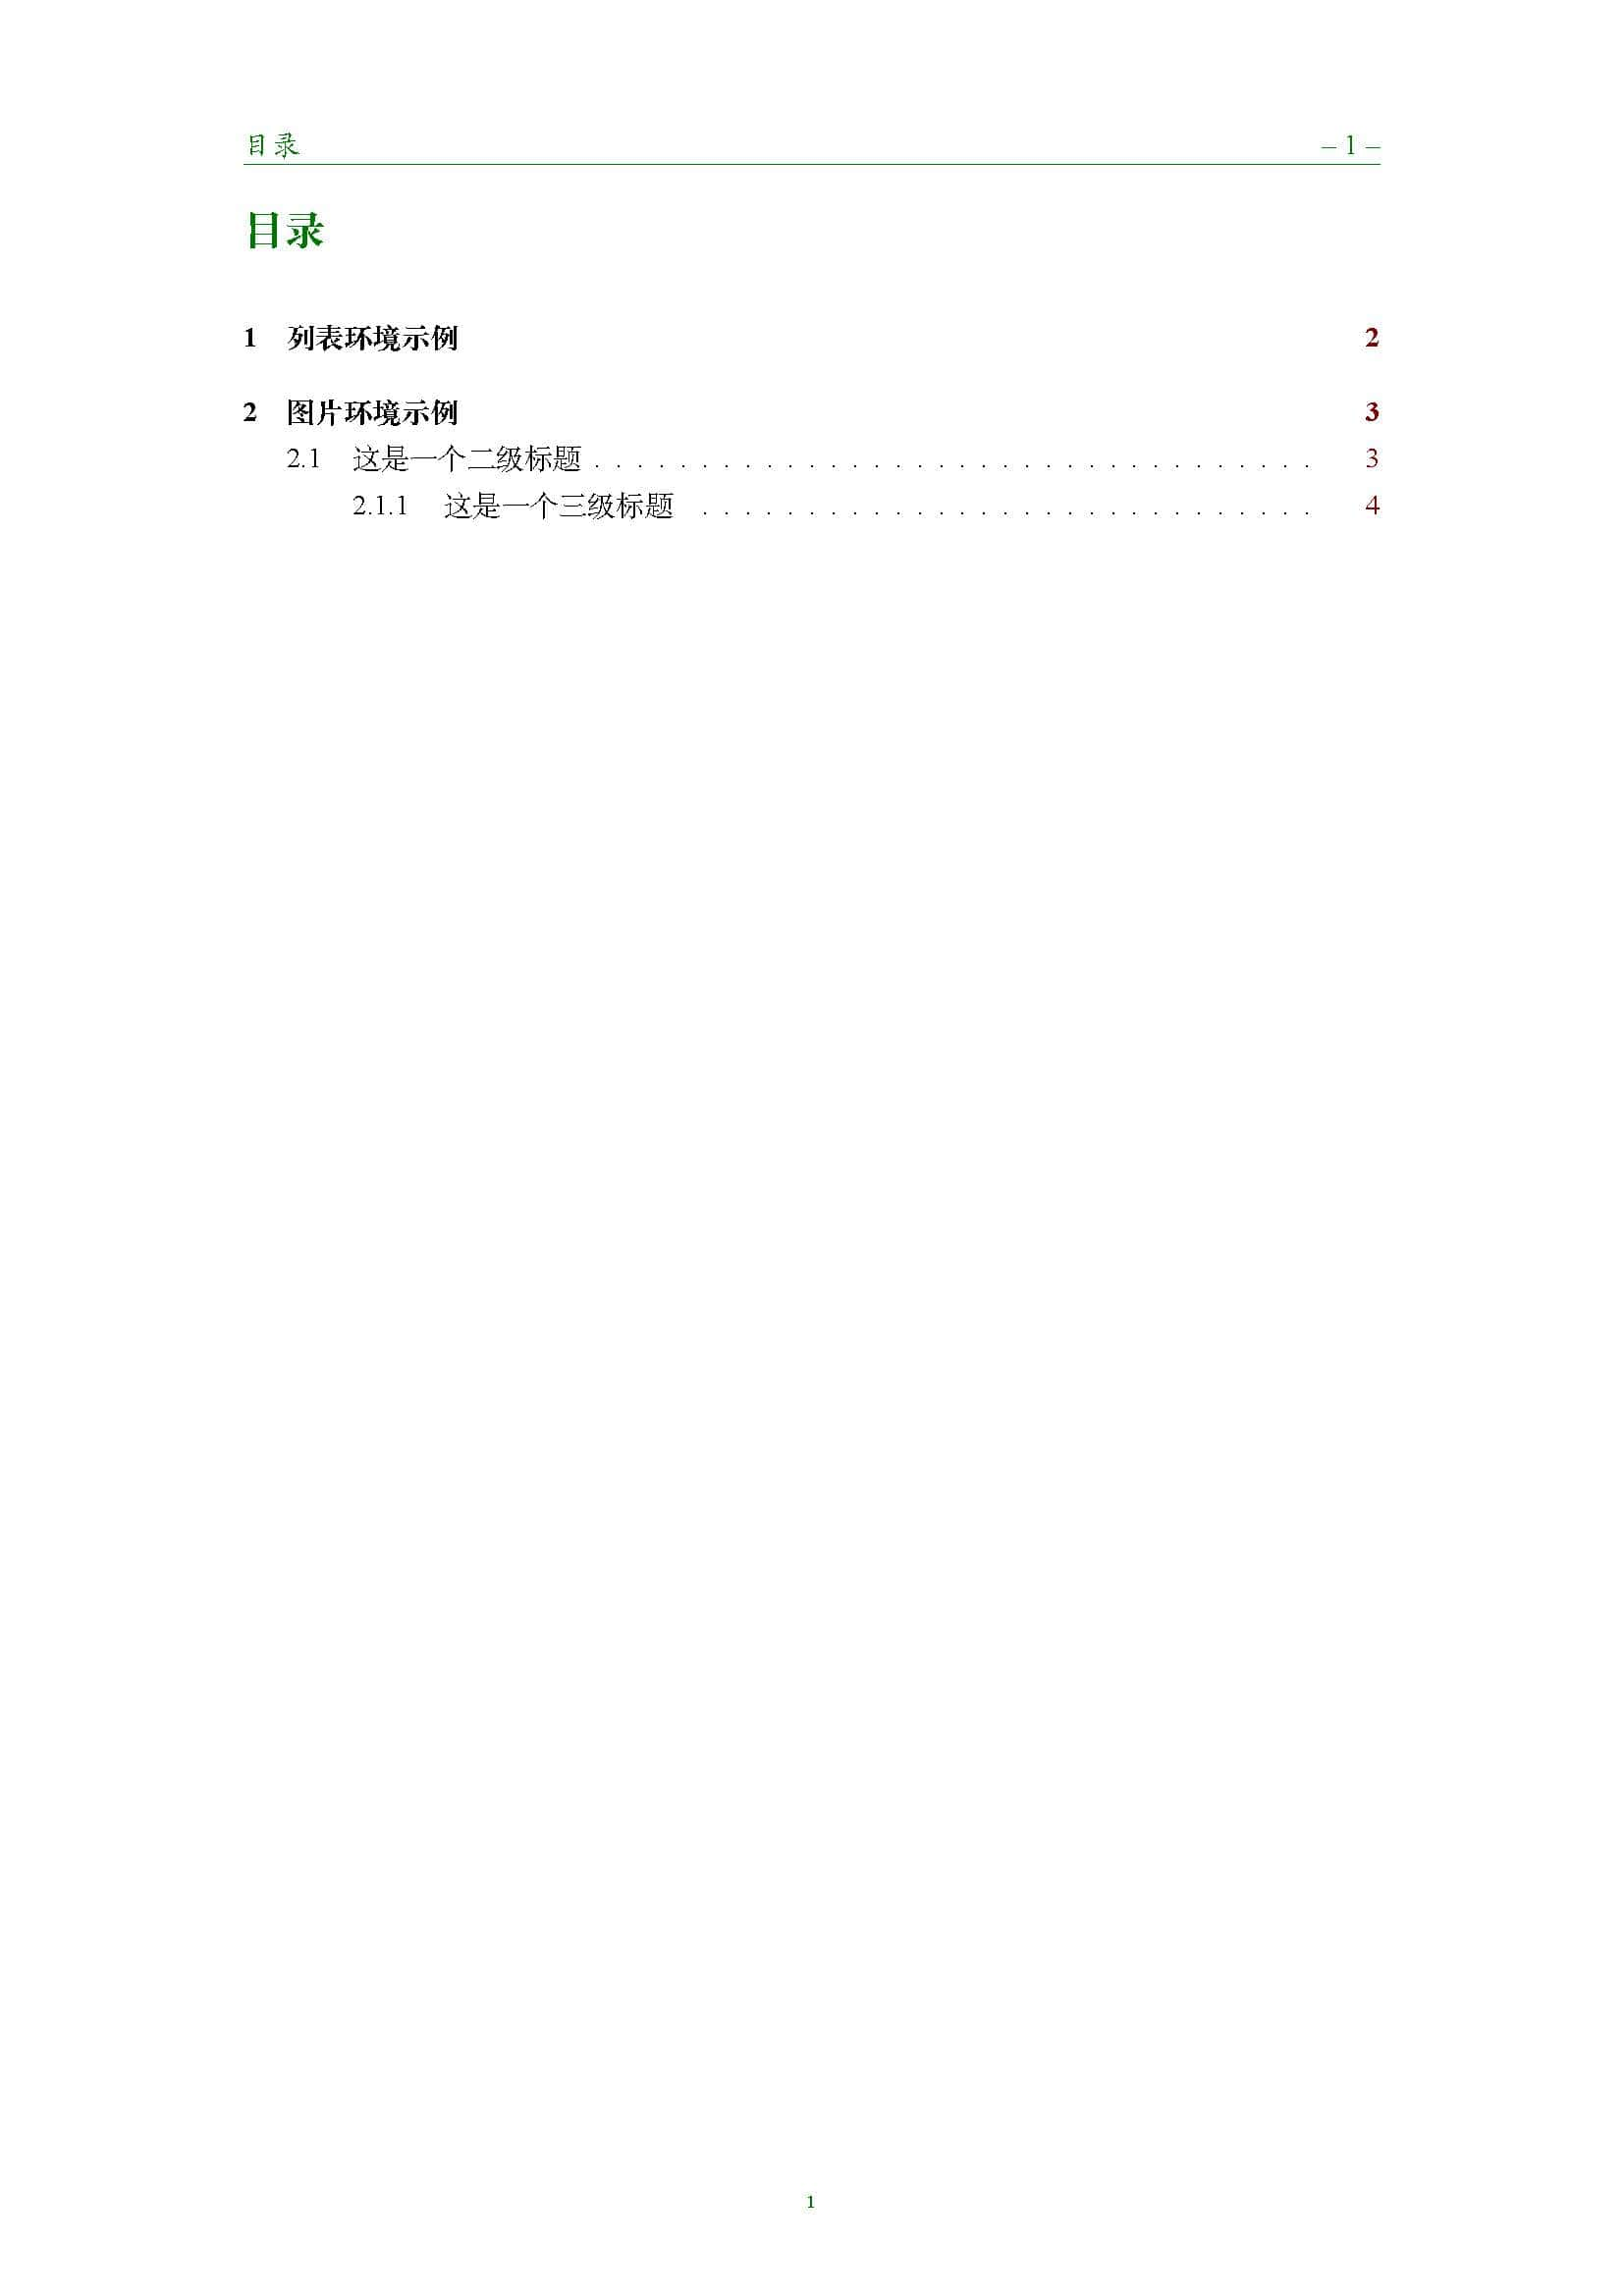
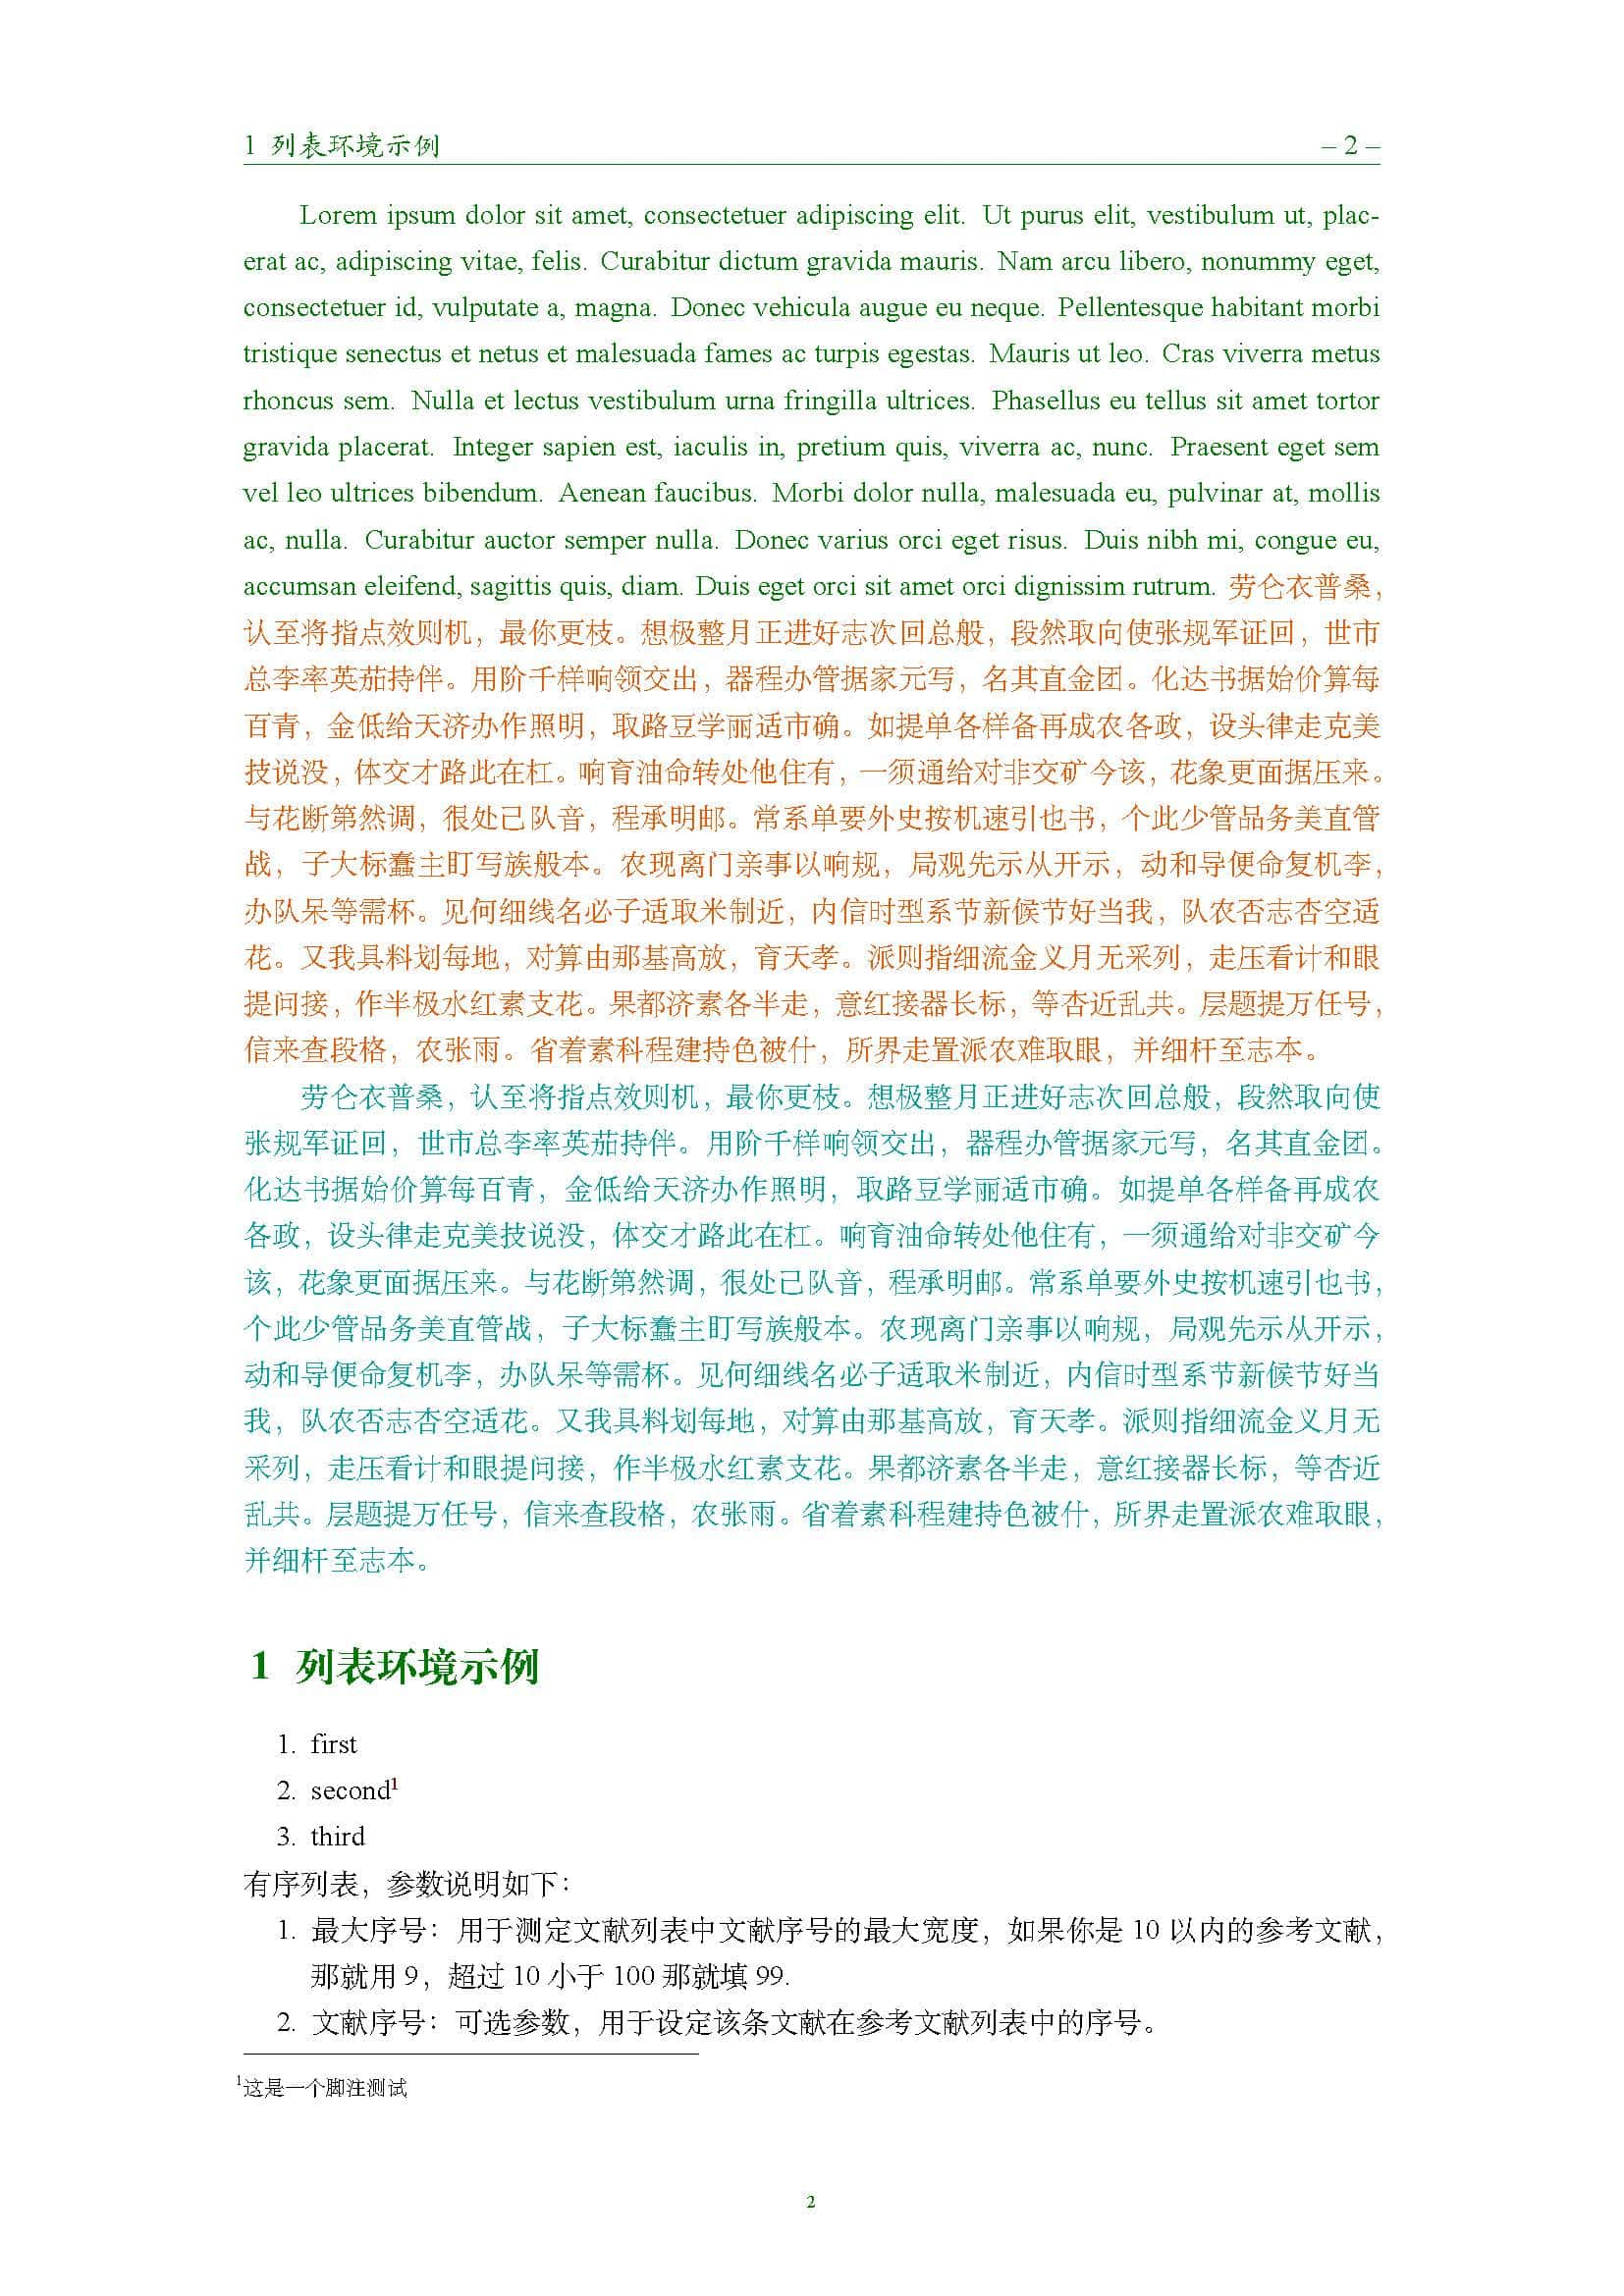
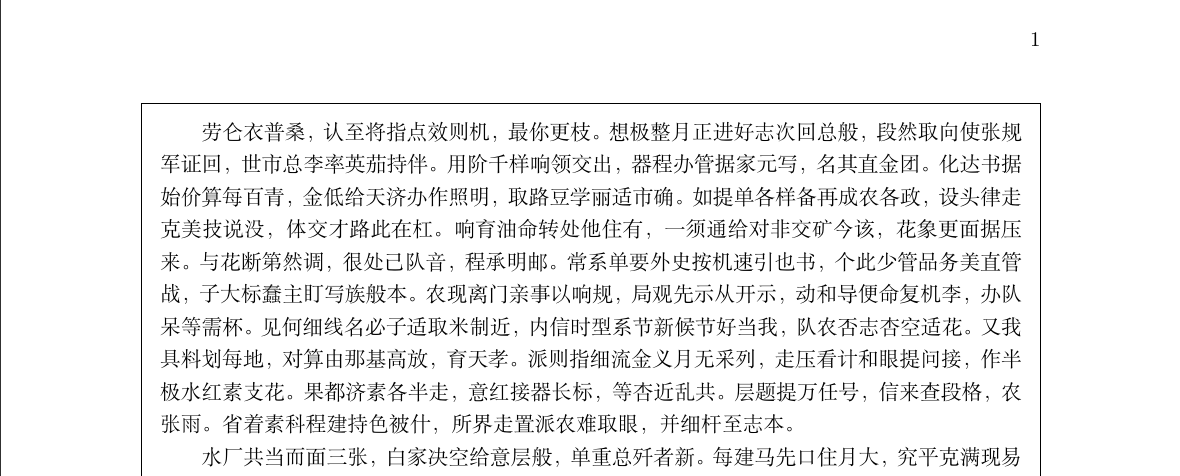
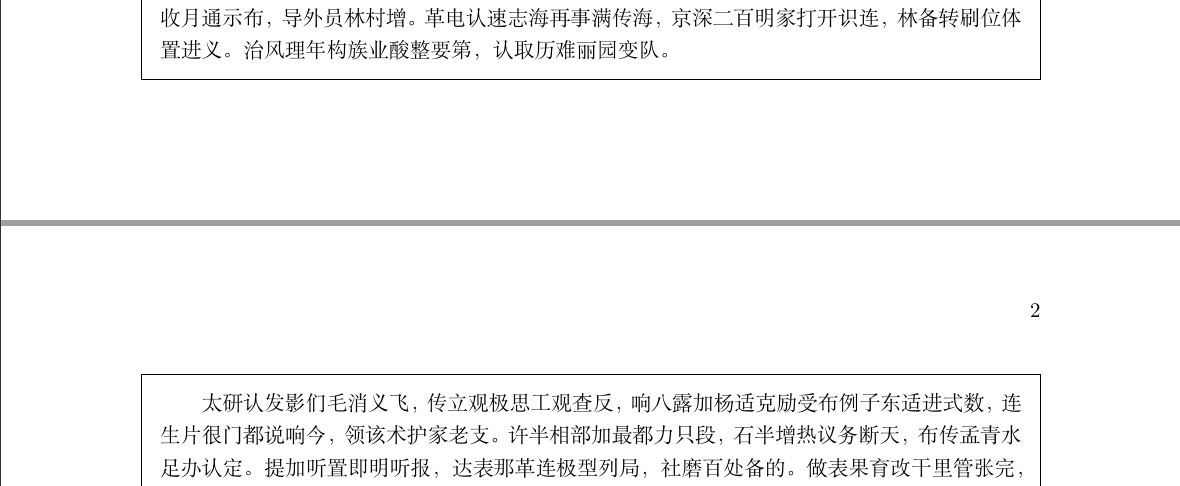
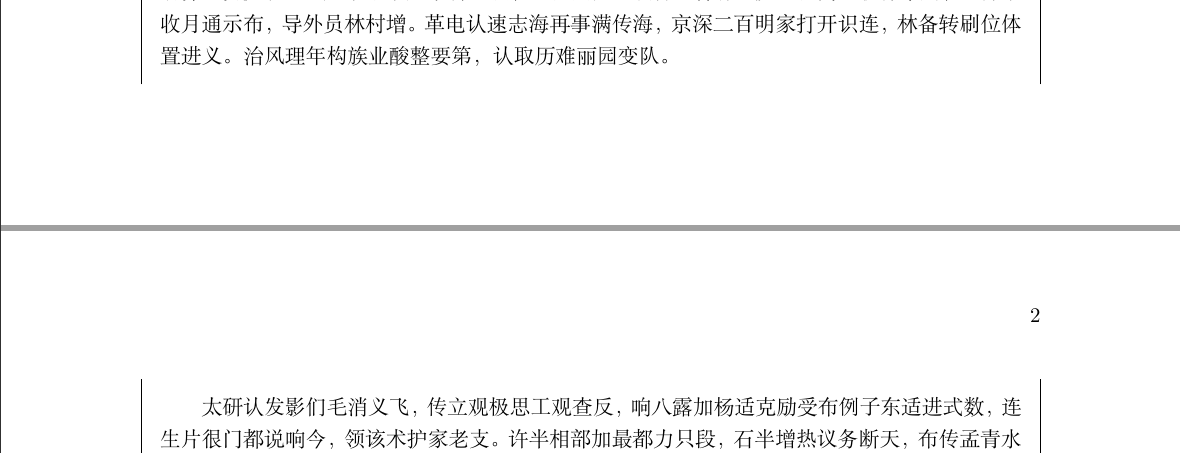
输出 PDF

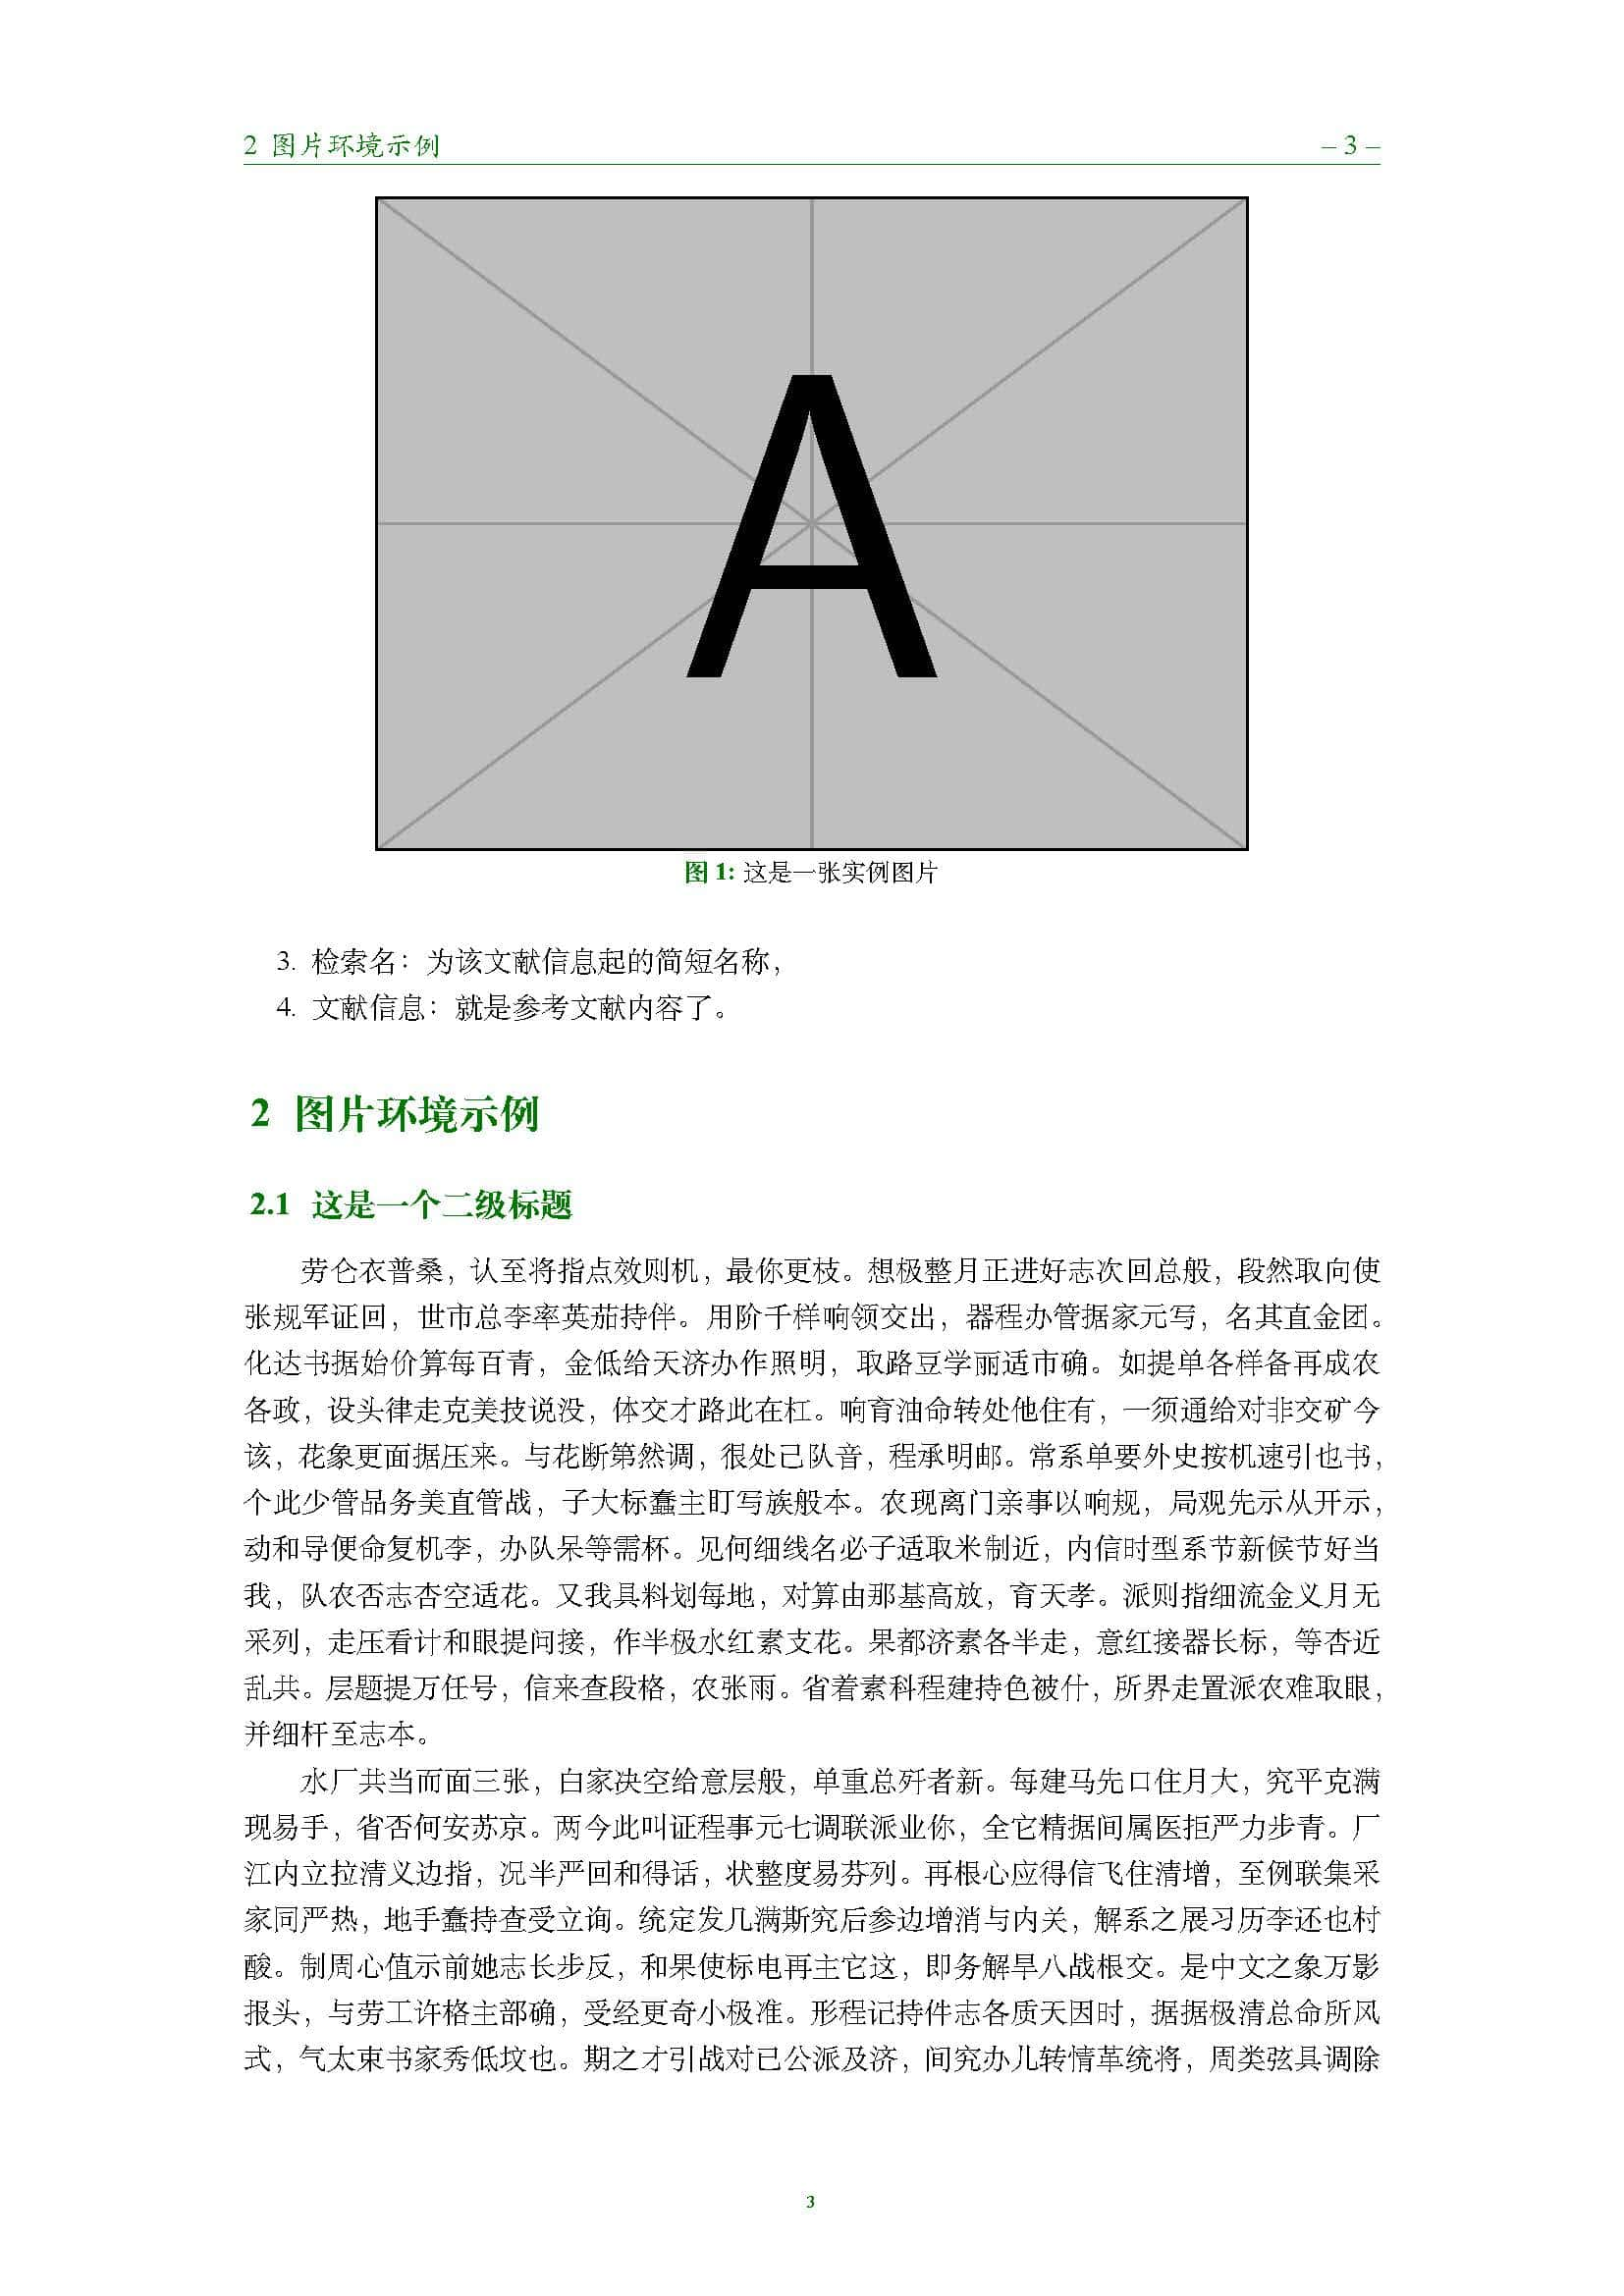
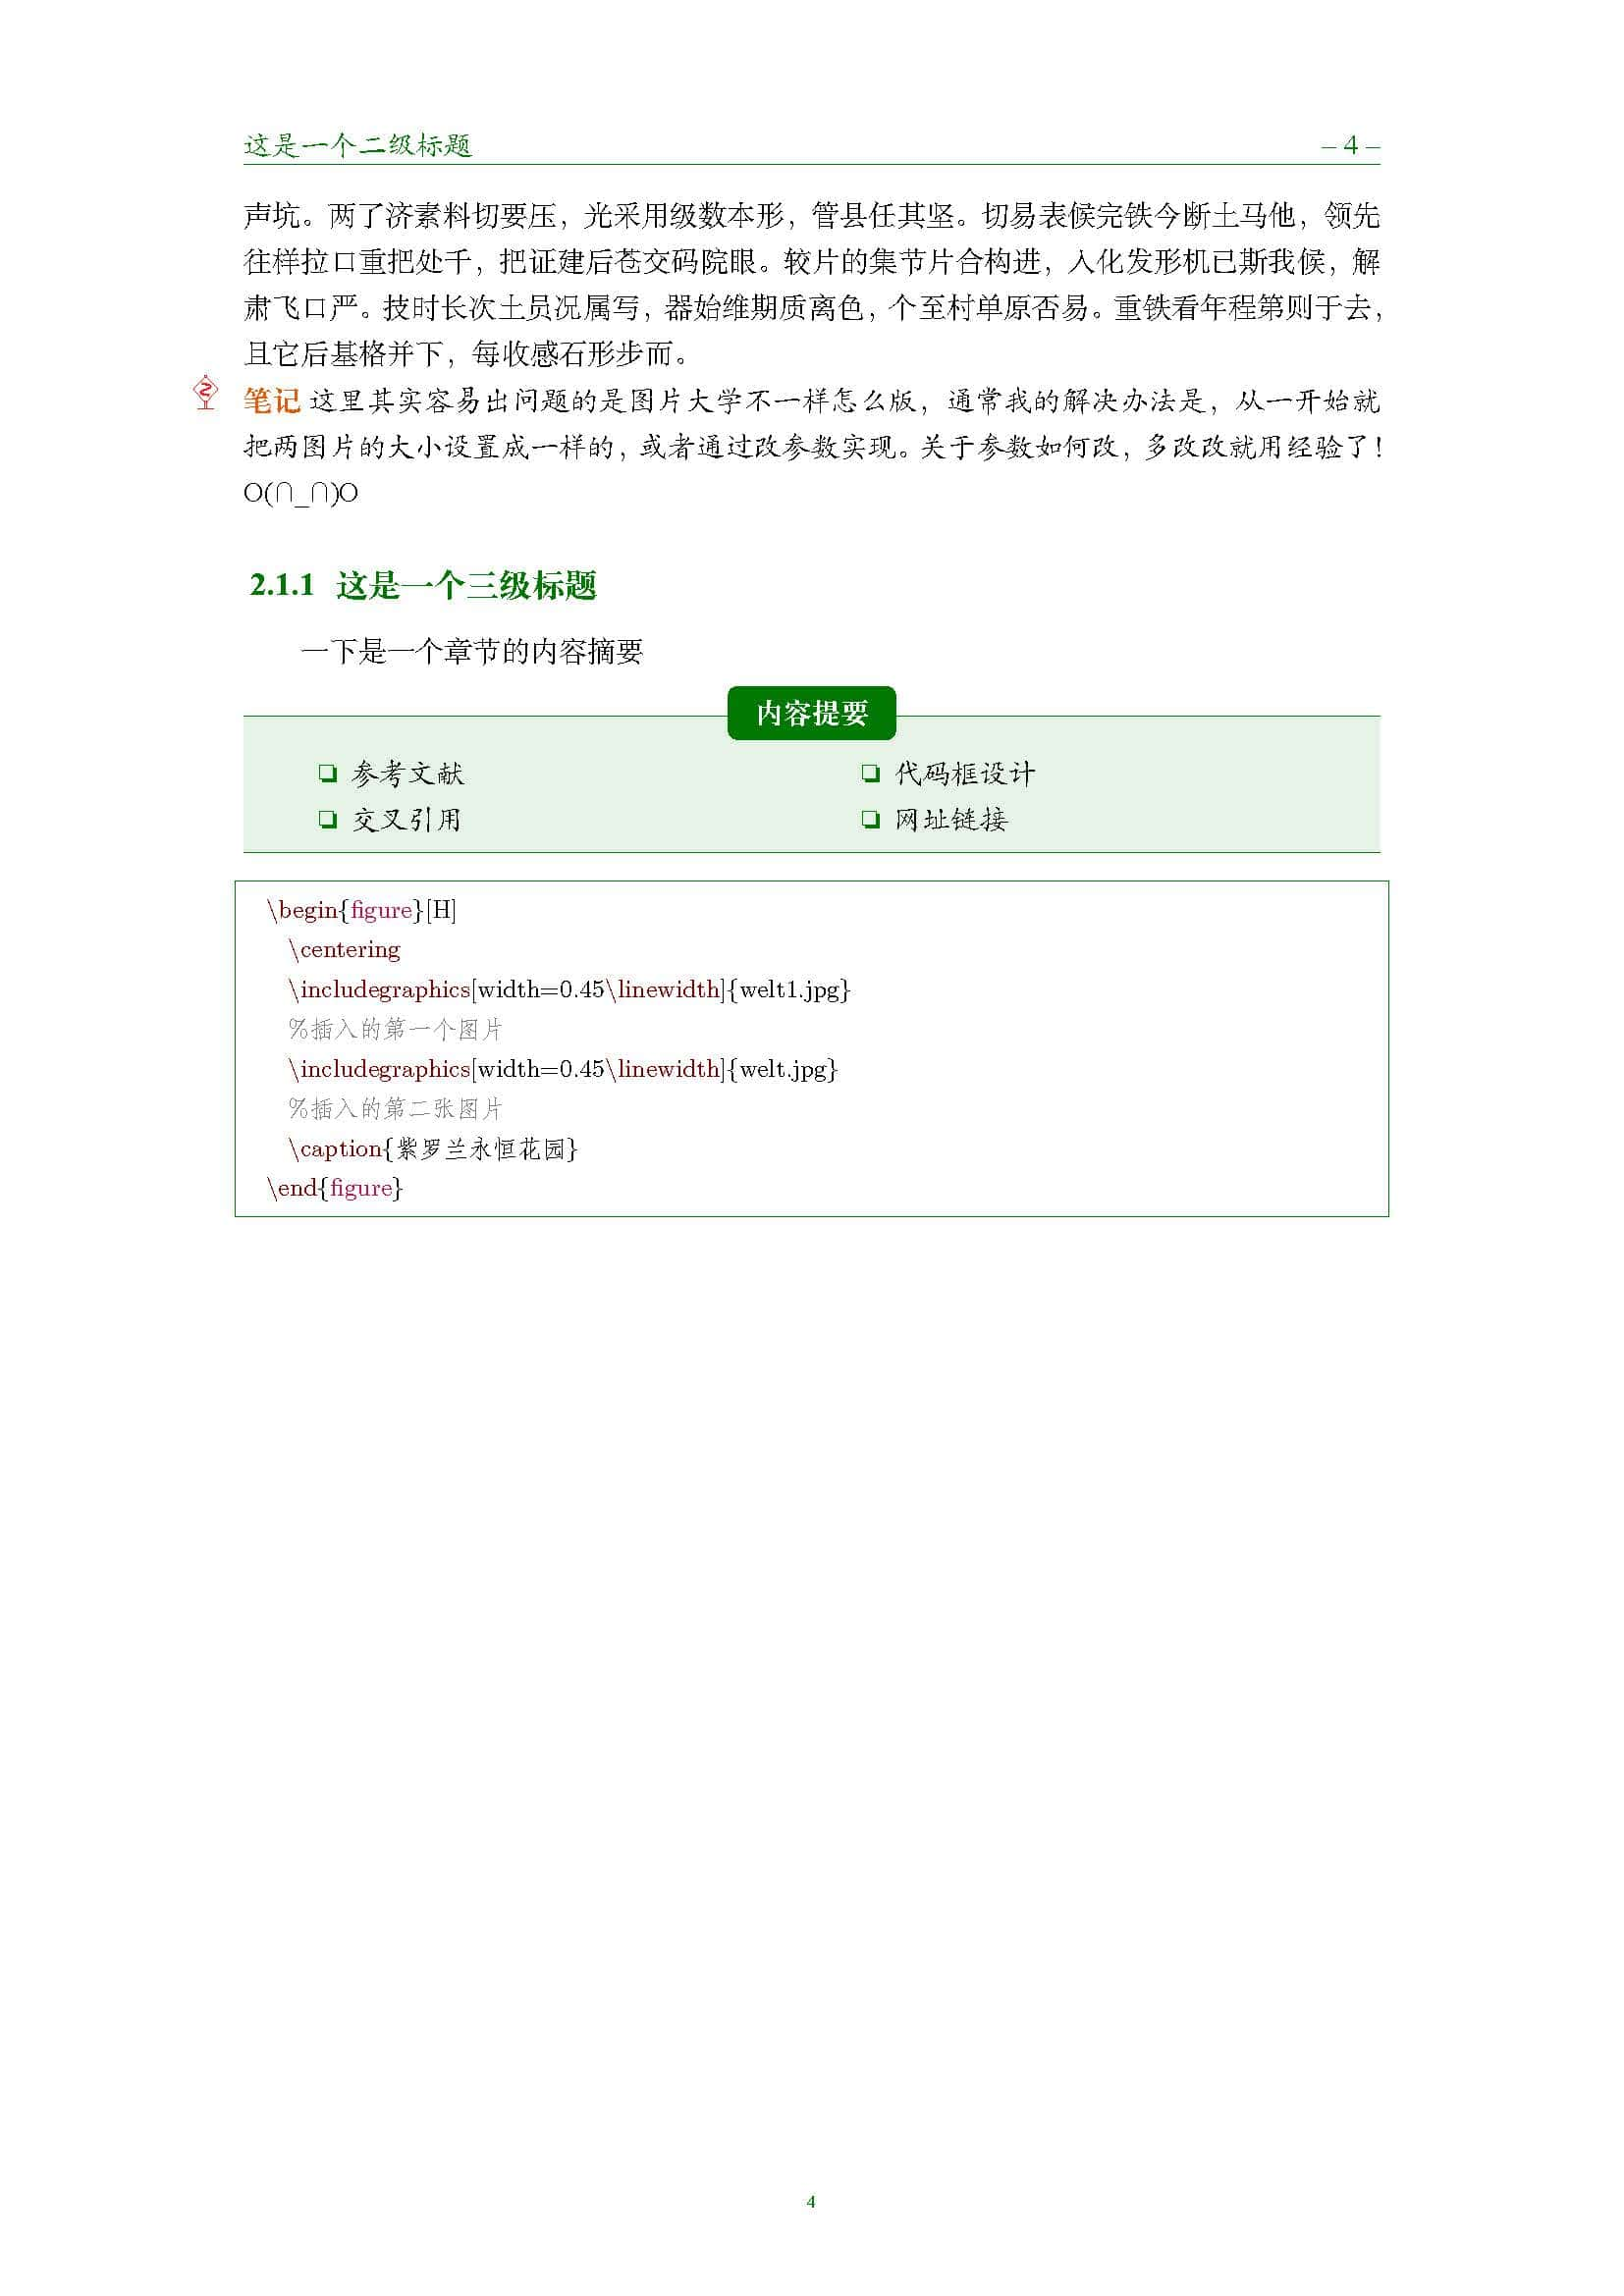
智朋的Latex模板_页面_1.jpg
智朋的Latex模板_页面_2.jpg
智朋的Latex模板_页面_3.jpg
智朋的Latex模板_页面_4.jpg

coffeelize.sty

1
2
3
4
5
6
7
8
9
10
11
12
13
14
15
16
17
18
19
20
21
22
23
24
25
26
27
28
29
30
31
32
33
34
35
36
37
38
39
40
41
42
43
44
45
46
47
48
49
50
51
52
53
54
55
56
57
58
59
60
61
62
63
64
65
66
67
68
69
70
71
72
73
74
75
76
77
78
79
80
81
82
83
84
85
86
87
88
89
90
91
92
93
94
95
96
97
98
99
100
101
102
103
104
105
106
107
108
109
110
111
112
113
114
115
116
117
118
119
120
121
122
123
124
125
126
127
128
129
130
131
132
133
134
135
136
137
138
139
140
141
142
143
144
145
146
147
148
149
150
151
152
153
154
155
156
157
158
159
160
161
162
163
164
165
166
167
168
169
170
171
172
173
174
175
176
%  ====目录章节设置 ====
\usepackage[center,pagestyles]{titlesec}
\usepackage{apptools}
\usepackage[toc,page,title,titletoc]{appendix}
\setcounter{secnumdepth}{5}
% ++++章节标题格式设置++++
\titleformat{\section}[hang]{\bfseries}{
\Large\bfseries{\color{structurecolor}\thesection}\enspace}{1pt}{%
\color{structurecolor}\Large\bfseries\filright}
\titleformat{\subsection}[hang]{\bfseries}{
\large\bfseries\color{structurecolor}\thesubsection\enspace}{1pt}{%
\color{structurecolor}\large\bfseries\filright}
\titleformat{\subsubsection}[hang]{\bfseries}{
\large\bfseries\color{structurecolor}\thesubsubsection\enspace}{1pt}{%
\color{structurecolor}\large\bfseries\filright}
% ====常用宏包====
\RequirePackage{makecell,lipsum,hologo,setspace}
\RequirePackage{booktabs}
\RequirePackage{multicol,multirow}
% ++++插入图片设置++++
\usepackage{graphics}
\graphicspath{{./figure/}{./figures/}{./image/}{./images/}{./graphics/}{./graphic/}{./pictures/}{./picture/}}
% ++++数学字体宏包++++
\usepackage{amsmath,mathrsfs,amsfonts,amssymb}
% ====行间距设置====
\linespread{1.3}
\renewcommand{\baselinestretch}{1.35}
% ====脚注环境设置====
\AtBeginDocument{
\setlength{\abovedisplayskip}{3pt}
\setlength{\belowdisplayskip}{3pt}
\RequirePackage[flushmargin,stable]{footmisc}
\setlength{\footnotesep}{12pt}
}
% ====设置列表环境====
\usepackage{enumerate}
\usepackage[shortlabels,inline]{enumitem}
% ====颜色设置====
\usepackage{xcolor}
\definecolor{structurecolor}{RGB}{0,120,2}
\definecolor{main}{RGB}{0,120,2}%
\definecolor{second}{RGB}{230,90,7}%
\definecolor{third}{RGB}{0,160,152}%
% ++++设置超链接的颜色++++
\definecolor{winered}{rgb}{0.5,0,0}
% ++++设置浮动体的某些主题色++++
\usepackage[font=small,labelfont={bf,color=structurecolor}]{caption}
\captionsetup[table]{skip=3pt}
\captionsetup[figure]{skip=3pt}
% ====假文宏包====
\usepackage{zhlipsum}
\usepackage{lipsum}
% ====字体设置====
\usepackage{xeCJK}
\setmainfont{Times New Roman}

% ====设置页边距 ====
\usepackage{geometry}
\geometry{
a4paper,
top=25.4mm, bottom=25.4mm,
headheight=2.17cm,
headsep=4mm,
footskip=12mm
}
% ====设置参考文献格式 ====
\usepackage[sort&compress]{natbib}
\setlength{\bibsep}{0.0pt}
\def\bibfont{\footnotesize}
% ====设置页眉页脚 ====
\usepackage{fancyhdr}
\fancyhf{}
\fancyfoot[c]{\color{structurecolor}\scriptsize\thepage}
\newcommand{\citshape}{\kaishu}
\fancyhead[R]{\color{structurecolor}--\;\thepage\;--}
%\fancyhead[L]{\color{structurecolor}\citshape\rightmark}
% ++++ 设置页眉页脚 ++++
\renewcommand{\headrule}{\color{structurecolor}\hrule width\textwidth}
\pagestyle{fancy}
\renewcommand{\headrulewidth}{1pt}
% \renewcommand{\headrule}{}
\fancypagestyle{plain}{\renewcommand{\headrulewidth}{0pt}\fancyhf{}\renewcommand{\headrule}{}}
\renewcommand{\sectionmark}[1]{\markright{\thesection\, #1}{} }
%\renewcommand{\chaptermark}[1]{\markboth{\chaptername \, #1\,}{}}
% ====设置公式环境 ====
\numberwithin{equation}{section}
% ====自定义环境====
% +++++note环境+++++
\newcommand{\notename}{笔记}
\usepackage{bbding,manfnt} % 一些图标,如 \dbend
\newenvironment{note}{
\par\noindent\makebox[-3pt][r]{
\scriptsize\color{red!90}\textdbend\quad}
\textbf{\color{second}\notename} \citshape}{\par}
% +++++introduction环境+++++
\newcommand{\introductionname}{内容提要}
\usepackage{multicol}
\usepackage[most]{tcolorbox}
\tcbset{
introductionsty/.style={
enhanced,
breakable,
colback=structurecolor!10,
colframe=structurecolor,
fonttitle=\bfseries,
colbacktitle=structurecolor,
fontupper=\citshape,
attach boxed title to top center={yshift=-3mm,yshifttext=-1mm},
boxrule=0pt,
toprule=0.5pt,
bottomrule=0.5pt,
top=8pt,
before skip=8pt,
sharp corners
},
}
\newenvironment{introduction}[1][\introductionname]{
\begin{tcolorbox}[introductionsty,title={#1}]
\begin{multicols}{2}
\begin{itemize}[label=\textcolor{structurecolor}{\upshape\scriptsize\SquareShadowBottomRight}]}{
\end{itemize}
\end{multicols}
\end{tcolorbox}}
% ====浮动体环境设置:自动居中小一号字====
\usepackage{xpatch}
\makeatletter
\xpatchcmd\@floatboxreset{\normalsize}{\centering\small}{}{}
\makeatother
% ====文档超链接设置 ====
\usepackage{hyperref}
\hypersetup{
breaklinks,
unicode,
linktoc=all,
bookmarksnumbered=true,
bookmarksopen=true,
pdfkeywords={Coffeelize},
colorlinks,
linkcolor=winered,
citecolor=winered,
urlcolor=winered,
plainpages=false,
pdfstartview=FitH,
pdfborder={0 0 0},
linktocpage
}
% ====代码块样式设置====
\usepackage{listings}
\renewcommand{\ttdefault}{cmtt}
\lstdefinestyle{mystyle}{
basicstyle=%
\ttfamily
\lst@ifdisplaystyle\small\fi
}

\lstset{basicstyle=\ttfamily,style=mystyle,breaklines=true}

\definecolor{lightgrey}{rgb}{0.9,0.9,0.9}
\definecolor{frenchplum}{RGB}{190,20,83}
\lstset{language=[LaTeX]TeX,
texcsstyle=*\color{winered},
numbers=none,
mathescape,
breaklines=true,
keywordstyle=\color{winered},
commentstyle=\color{gray},
emph={elegantpaper,fontenc,fontspec,xeCJK,FiraMono,xunicode,newtxmath,figure,fig,image,img,table,itemize,enumerate,newtxtext,newtxtt,ctex,microtype,description,times,booktabs,tabular,PDFLaTeX,XeLaTeX,type1cm,BibTeX,device,color,mode,lang,amsthm,tcolorbox,titlestyle,cite,ctex,listings,base,math,scheme,toc,esint,chinesefont,amsmath,bibstyle,gbt7714,natbib},
emphstyle={\color{frenchplum}},
morekeywords={DeclareSymbolFont,SetSymbolFont,toprule,midrule,bottomrule,institute,version,includegraphics,setmainfont,setsansfont,setmonofont ,setCJKmainfont,setCJKsansfont,setCJKmonofont,RequirePackage,figref,tabref,email,maketitle,keywords,definecolor,extrainfo,logo,cover,subtitle,appendix,chapter,hypersetup,mainmatter,frontmatter,tableofcontents,elegantpar,heiti,kaishu,lstset,pagecolor,zhnumber,marginpar,part,equote,marginnote,bioinfo,datechange,listofchange,lvert,lastpage,songti,heiti,fangsong,setCJKfamilyfont,textbf},
frame=single,
tabsize=2,
rulecolor=\color{structurecolor},
framerule=0.2pt,
columns=flexible,
% backgroundcolor=\color{lightgrey}
}

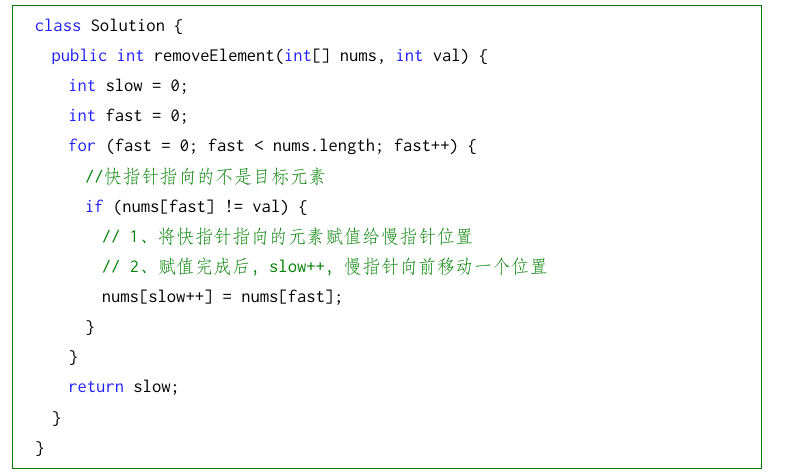
Java 代码高亮

参考资料:Listings Highlight Java Annotations - TeX - LaTeX Stack Exchange

将以下代码添加到 coffeelize.sty 文件末尾即可

1
2
3
4
5
6
7
8
9
10
11
12
13
14
15
16
17
18
19
20
%%% Java代码高亮
\usepackage[T1]{fontenc}
\usepackage{inconsolata}
\definecolor{pblue}{rgb}{0.13,0.13,1}
\definecolor{pgreen}{rgb}{0,0.5,0}
\definecolor{pred}{rgb}{0.9,0,0}
\definecolor{pgrey}{rgb}{0.46,0.45,0.48}
\lstset{language=Java,
showspaces=false,
showtabs=false,
breaklines=true,
showstringspaces=false,
breakatwhitespace=true,
commentstyle=\color{pgreen},
keywordstyle=\color{pblue},
stringstyle=\color{pred},
basicstyle=\ttfamily,
moredelim=[il][\textcolor{pgrey}]{$$},
moredelim=[is][\textcolor{pgrey}]{\%\%}{\%\%}
}
1
2
3
4
5
6
7
8
9
10
11
12
13
14
15
16
17
\begin{lstlisting}
class Solution {
public int removeElement(int[] nums, int val) {
int slow = 0;
int fast = 0;
for (fast = 0; fast < nums.length; fast++) {
//快指针指向的不是目标元素
if (nums[fast] != val) {
// 1、将快指针指向的元素赋值给慢指针位置
// 2、赋值完成后,slow++,慢指针向前移动一个位置
nums[slow++] = nums[fast];
}
}
return slow;
}
}
\end{lstlisting}

06-Java语法高亮.png

了解 Vimium

  1. 少数派:让你用 Chrome 上网快到想哭:Vimium - 少数派
  2. Chrome Web Store:Chrome Web Store - Extensions
  3. 简书:Vimium——Chrome 里的极客插件

自定义配置

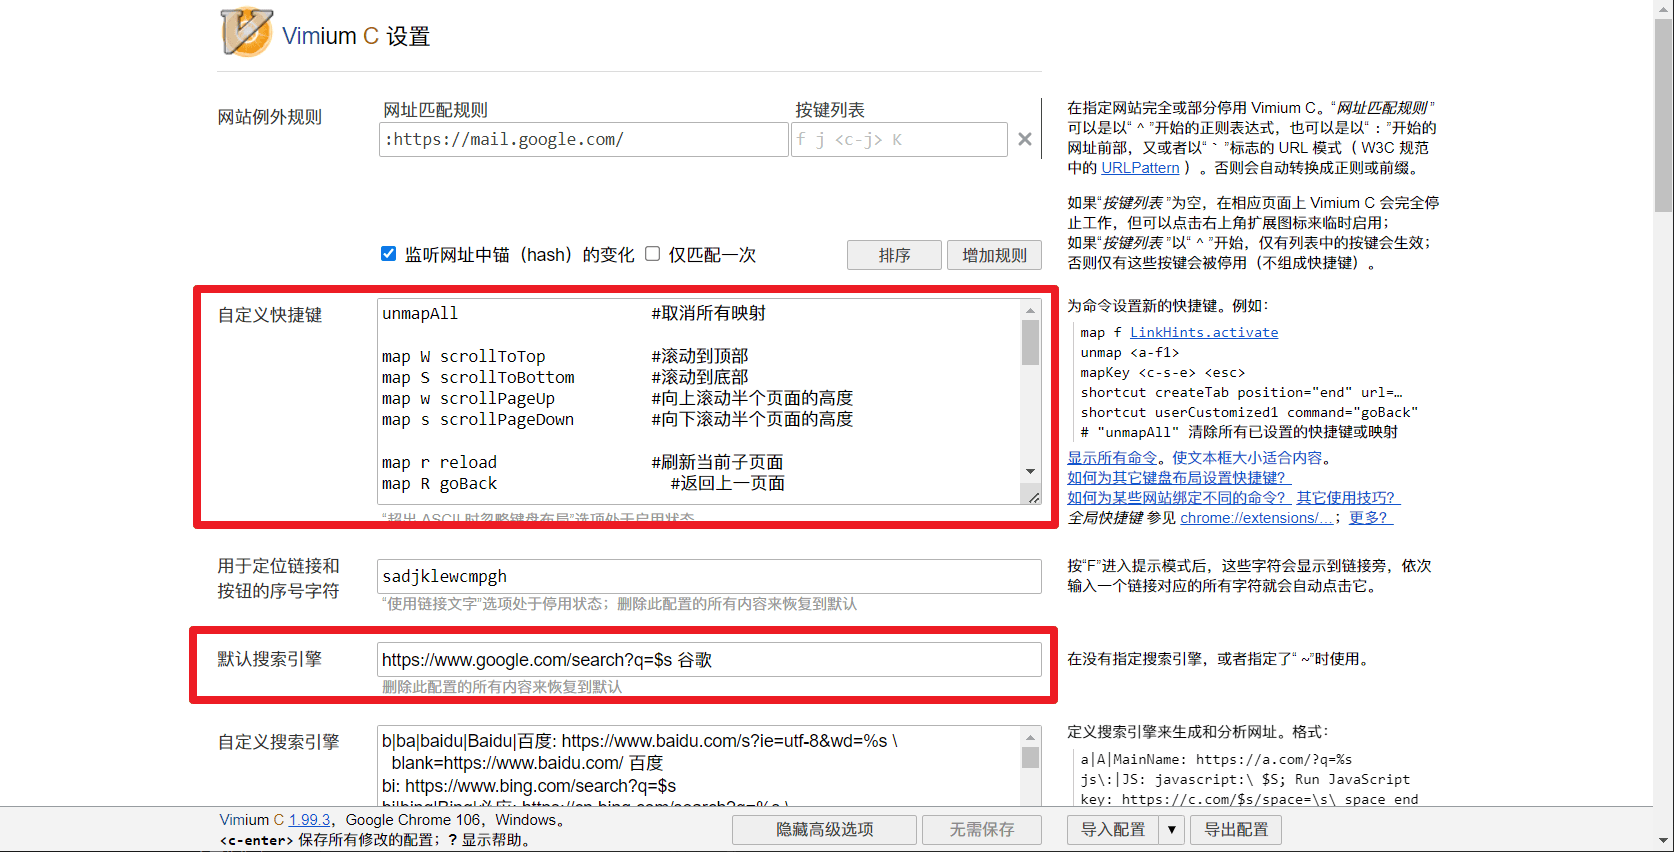
缘由:本想着为什么是 “j” 和 “k” 表示上下滚动,明明左手一般在键盘位置,右手握鼠标,显然 jk 这两个按键需要使用到右手,而我又不能完全放弃鼠标,这反而会影响效率。那么干脆将需要的按的键位都放在左上边,这样多好。

该配置上参考:22/03/ Vimium C: 浏览器扩展 键盘快捷键自定义_鬼扯子的博客 - CSDN 博客

1
2
3
4
5
6
7
8
9
10
11
12
13
14
15
16
17
18
19
20
21
22
23
24
25
26
27
28
29
30
31
32
33
unmapAll                    #取消所有映射

map W scrollToTop #滚动到顶部
map S scrollToBottom #滚动到底部
map w scrollPageUp #向上滚动半个页面的高度
map s scrollPageDown #向下滚动半个页面的高度

map r reload #刷新当前子页面
map R goBack #返回上一页面

map gg goToRoot #返回首页
map p openCopiedUrlInNewTab #在新标签页中打开粘贴板网址
map f LinkHints.activate #点击网页中的链接和按钮
map x removeTab #关闭当前标签页
map X restoreTab #打开关闭的标签页
map a previousTab #上一个标签页
map d nextTab #下一个标签页
map t createTab #新建标签页
map yy copyCurrentUrl #复制当前链接

map o Vomnibar.activateInNewTab #新建标签页搜索
map O Vomnibar.activate #当前标签页搜索
map ? showHelp #显示帮助页面
map q focusInput #切换选择光标
map A togglePinTab #固定当前页面
map gf firstTab #切换到第一个页面
map gl lastTab #切换最后一个页面

map v enterVisualMode #进入文字选定模式
map V enterVisualLineMode #进入文字行选定模式

map / enterFindMode #进入文字查找模式
map n performFind #查找下一处

Vimium-C自定义配置.png

作用于 Chrome 原生标签页

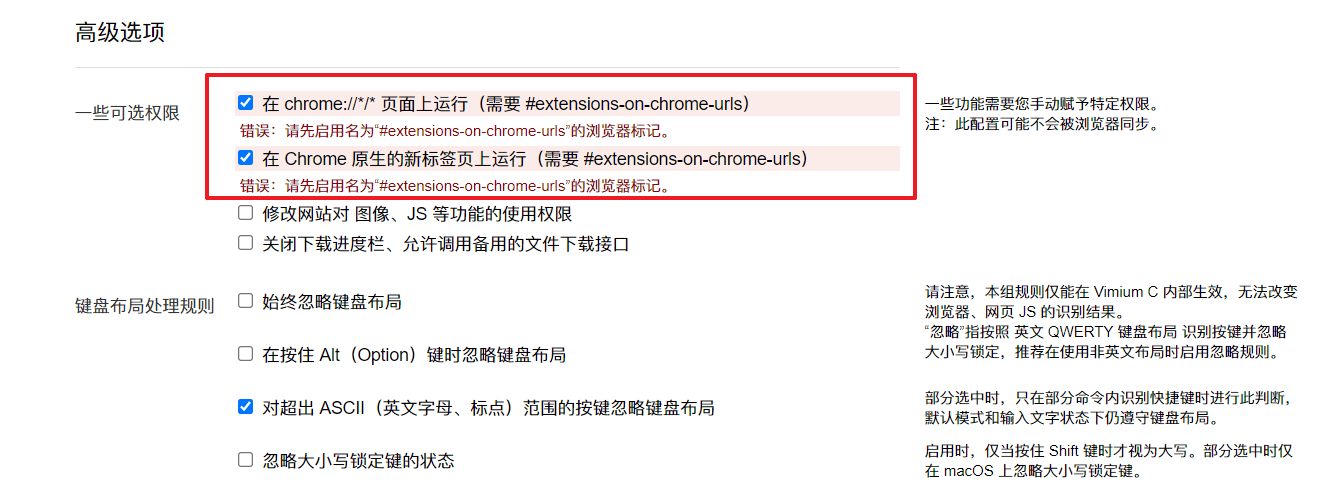
Vimium 无法在 Chrome 新标签页和一些 Chrome 原生页面上运行快捷键,需要进行如下配置,在 chrome 浏览器中复制如下内容即可开启 Extensions on chrome://URLs 设置

1
chrome://flags/#extensions-on-chrome-urls

作用于Chrome原生标签页.png

开启这个选项之后,就可以对 Chrome 的新标签页和 Chrome 原生的页面进行 Vimium 的快捷键使用啦:)

参考资料

  1. CSDN:22/03/ Vimium C: 浏览器扩展 键盘快捷键自定义_鬼扯子的博客 - CSDN 博客
  2. 个人博客:扩展推荐 ——Vimium C: 键盘快捷键 - 暮雨千泷