Latex 图片并排及子图标题设置
以下案例中可能使用到的宏包
- 需要图片:graphics
- 需要子图表:subfigure
- 需要给每个图片定义小标题:subcaption
- 修改图片的标题样式:caption
- 案例中使用到的图片: 下载地址
1
2
3
4
5
6
7
8
9
10
11
12
13
14
15
16
17
| \documentclass{ctexart}
\usepackage{graphicx}
\usepackage{subfigure}
\begin{document}
\begin{figure}
\centering
\subfigure[Small Box with a Long Caption]{
\label{fig:subfig:a}
\includegraphics[width=1.0in]{figs/cat2}}
\hspace{1in}
\subfigure[Big Box]{
\label{fig:subfig:b}
\includegraphics[width=1.5in]{figs/cat2}}
\caption{Two Subfigures}
\label{fig:subfig}
\end{figure}
\end{document}
|
![01-不使用minipage并排插图.png]()
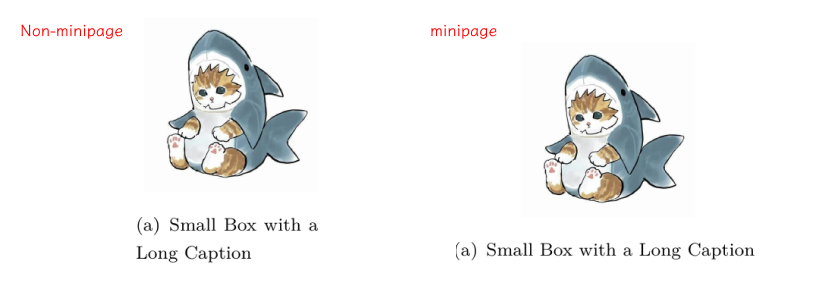
像其它的并列图形一样,子图也可以在小页环境中使用。而且在一些情况下, 这样做还能更方便的得到理想的图形间距。例如:
1
2
3
4
5
6
7
8
9
10
11
12
13
14
15
16
17
18
19
20
21
22
| \documentclass{ctexart}
\usepackage{graphicx}
\usepackage{subfigure}
\begin{document}
\begin{figure}
\subfigure[Small Box with a Long Caption]{
\label{fig:mini:subfig:a}
\begin{minipage}[b]{0.5\textwidth}
\centering
\includegraphics[width=1in]{figs/cat2}
\end{minipage}}
\subfigure[Big Box]{
\label{fig:mini:subfig:b}
\begin{minipage}[b]{0.5\textwidth}
\centering
\includegraphics[width=1.5in]{figs/cat2}
\end{minipage}}
\caption{Minipages Inside Subfigures}
\label{fig:mini:subfig}
\end{figure}
\end{document}
|
![02-使用minipage并排插图.png]()
比较可发现
使用 minipage 环境:子标题的长度可以长于图片的长度
![03-minipage with non-minipage.png]()
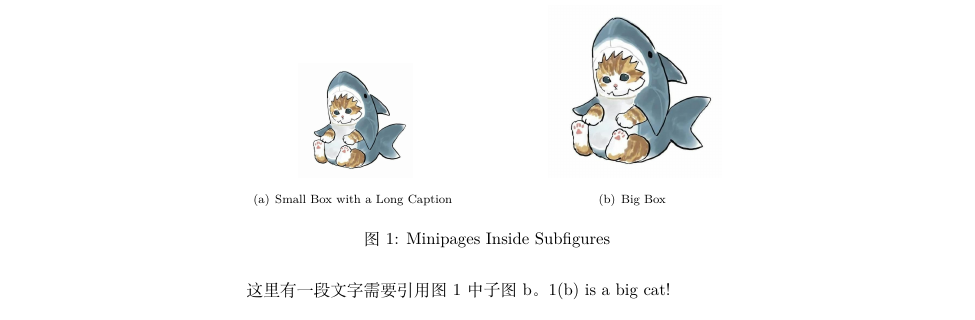
需求 2:那么如何引用大图当中的子图呢
这就发挥到 label 的作用了,label 标签相当于给子图片打上了一个标记,在引用的地方通过 ref 引用标签名即可
在图片环境的代码后面添加如下文字
1
2
3
4
5
6
|
\end{figure}
这里有一段文字需要引用图1中子图b。\ref{fig:mini:subfig:b} is a big cat!
|
![04-交叉引用子图.png]()
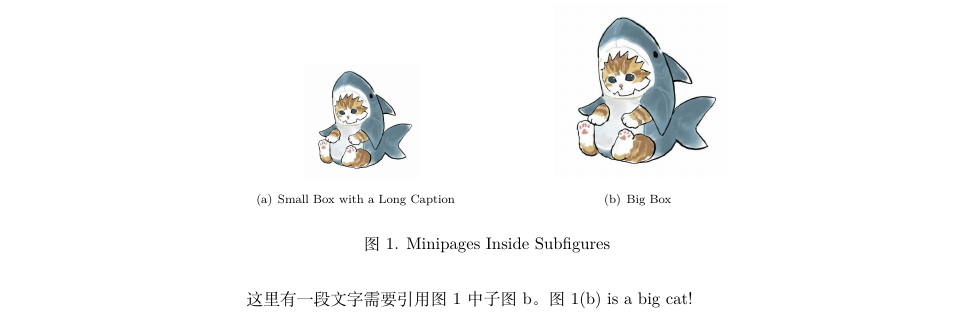
需求 3:修改标签分隔符
包含子图的大图标题,图编号与图表题文字之间的分隔符为冒号,如何设置为英文句点,参考 caption 宏包使用文档(但是目前该文档似乎还没有中文翻译)
1
2
3
| \usepackage{caption}
使用如下captionsetup命令需要使用到caption宏包
\captionsetup[figure]{labelformat=simple, labelsep=period}
|
如何查看宏包的帮助文档
- 按住 shift,鼠标右键
- 使用 Powershell 打开
- texdoc 宏包名(比如
texdoc tabular)
![07-(Latex)查看宏包帮助文档.gif]()
标签格式设置
| 格式 |
说明 |
| default |
同 simple |
| empty |
空格式,去除标签编号部分 |
| simple |
简单数字格式 |
| brace |
数字右括号格式 |
| parens |
带括号数字格式 |
标签分隔符
| 格式 |
说明 |
| default |
同 colon |
| none |
无间隔 |
| colon |
英文分号 |
| period |
英文句点 |
| space |
空格 |
| quad |
一个 em 的间隔 |
| newline |
标题另起一行 |
| endash |
英文 dash 连接符 |
同理,对于子图当中标签分隔符的设置,只要将中括号中的 figure 改为 subfigure 即可
1
| \captionsetup[subfigure]{...}
|
需求 4:如何修改交叉引用的图例
比如上图中,引用图 1 的子图 b,但是如何让 1(b) 显示为 图 1(b) 呢
搜了一圈,似乎只能通过文字打上去 (lll¬ω¬)
1
2
3
4
5
6
|
\end{figure}
这里有一段文字需要引用图1中子图b。图\ref{fig:mini:subfig:b} is a big cat!
|
![05-交叉引用图片格式.png]()
需求 5:多个子图,但是共享一个大标题,无需为子图添加标题
实际上就是在 figure 环境当中插入多张图片,但是只添加一个 caption
1
2
3
4
5
6
7
8
9
10
11
12
13
14
| \documentclass{ctexart}
\usepackage{graphicx}
\begin{document}
\begin{figure}
\centering
\includegraphics[width=90pt]{figs/cat2} \qquad
\includegraphics[width=90pt]{figs/cat2}
\caption{There are two figure share one caption}
\label{share-one-caption}
\end{figure}
这里有一段文字需要引用图1。图\ref{share-one-caption}有两张子图组成
\end{document}
|
![06-子图共享大标题.png]()
更高阶的应用
修改子图编号格式
1
2
3
| \renewcommand{\thesubfigure}{\arabic{subfigure}}
\renewcommand{\thesubfigure}{(\alph{subfigure})}
\renewcommand{\thesubtable}{(\alph{subtable})}
|
修改子图为 图 7.1 的形式
1
2
| \renewcommand{\thefigure}{\arabic{chapter}.\arabic{figure}}
\renewcommand{\thetable}{\arabic{chapter}.\arabic{table}}
|
修改子图标题字体格式(详见 Caption 宏包选项和设置)
1
2
3
4
|
\captionsetup[subfigure]{labelfont=bf,textfont=normalfont,singlelinecheck=off,justification=raggedright}
\captionsetup[figure]{labelformat=simple, labelsep=none}
|
参考资料